Contact List View Overview
Summary
This is the list of all contact records that are in the Users database. This view allows the User to perform several actions with the Contacts. The new Contact List View is at https://myatrealty.com/v2/crm/contacts. The User can click Revert to Previous Version at the top of the page to switch back to the old contacts view at any time.

Search Field
The search field will allow the User to search the Contacts list by Name, Phone Number, or Email.

Contacts Table Columns
By default, the Contacts Table will include the following columns:
- Name
- Type
- Number
- Tag
- Contact Owner
- Last Contacted
- Created
- Action
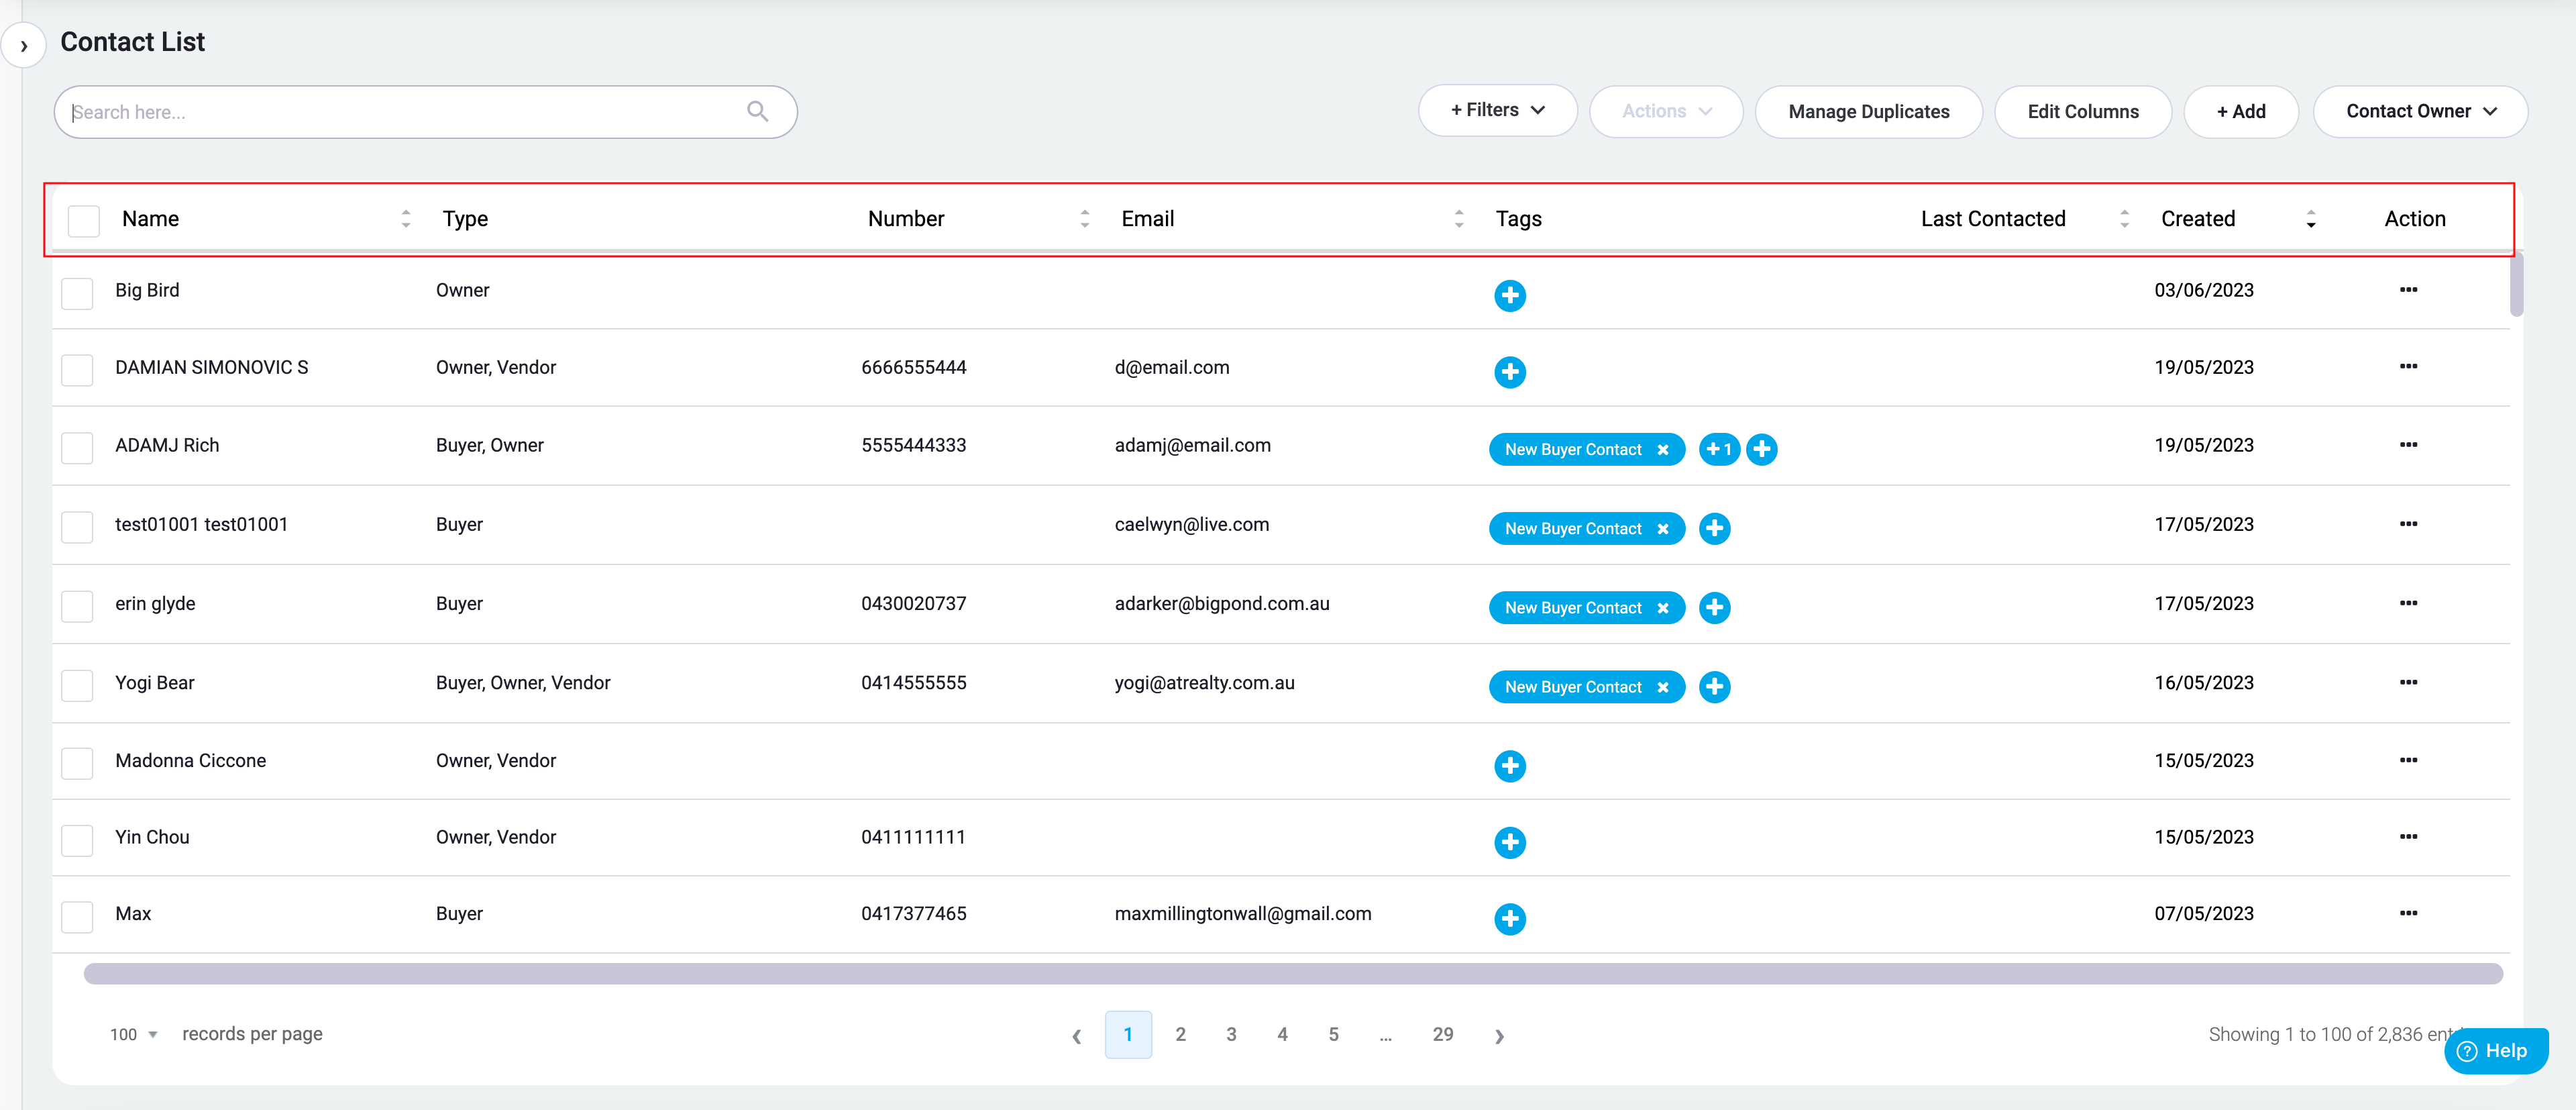
The order of the columns can be changed by dragging and dropping the column.
The User can sort the table by clicking on a column header. Sortable columns show an arrow icon next to the column name. The sortable columns are: Name, Number, Email, Last Contacted, and Created.
Filter Panel
Clicking the Filter button on the left of the search box opens the Filter quick panel. The panel has five sections — Type, Tags, Contact Owner, Country, Status — and each one opens its own popover when clicked (one at a time).
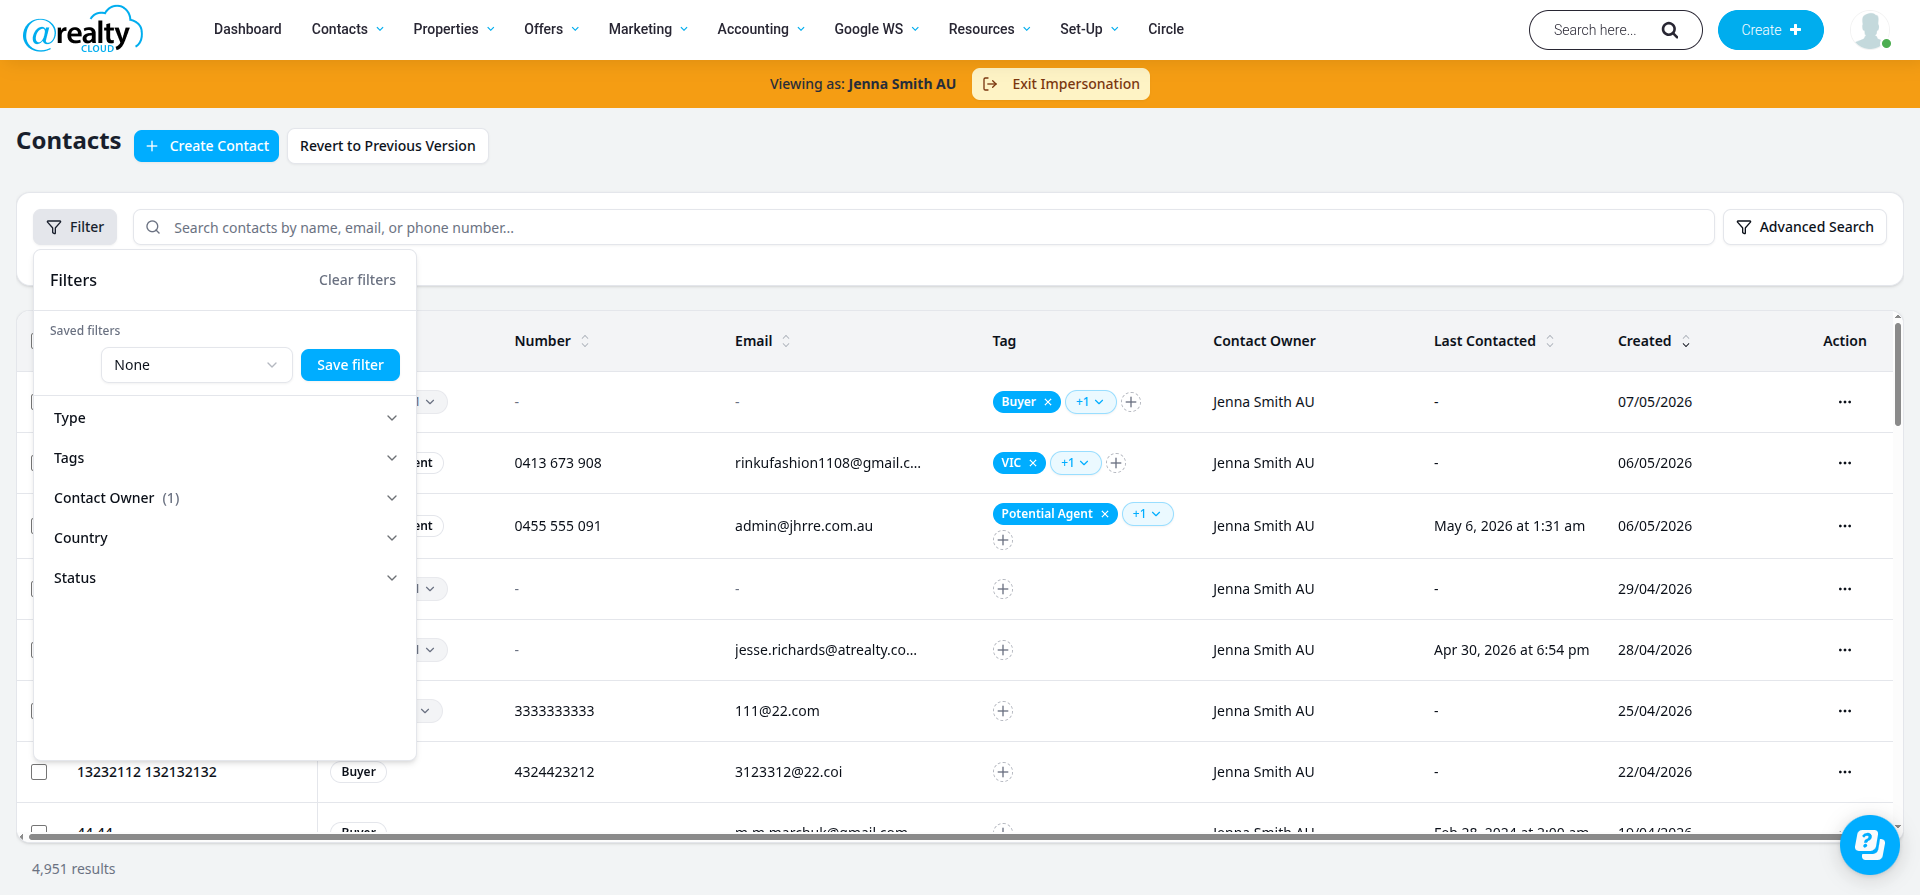
For details on each filter, see the Contacts Filters section below.
Contact Owner
The Contact Owner appears in two places in the new view: as a default filter chip (Contact Owner: Me) above the table, and as a column in the Contacts Table.
The User can select which contacts are displayed based on the ownership of the Contact Records. By default, the Me option is selected.
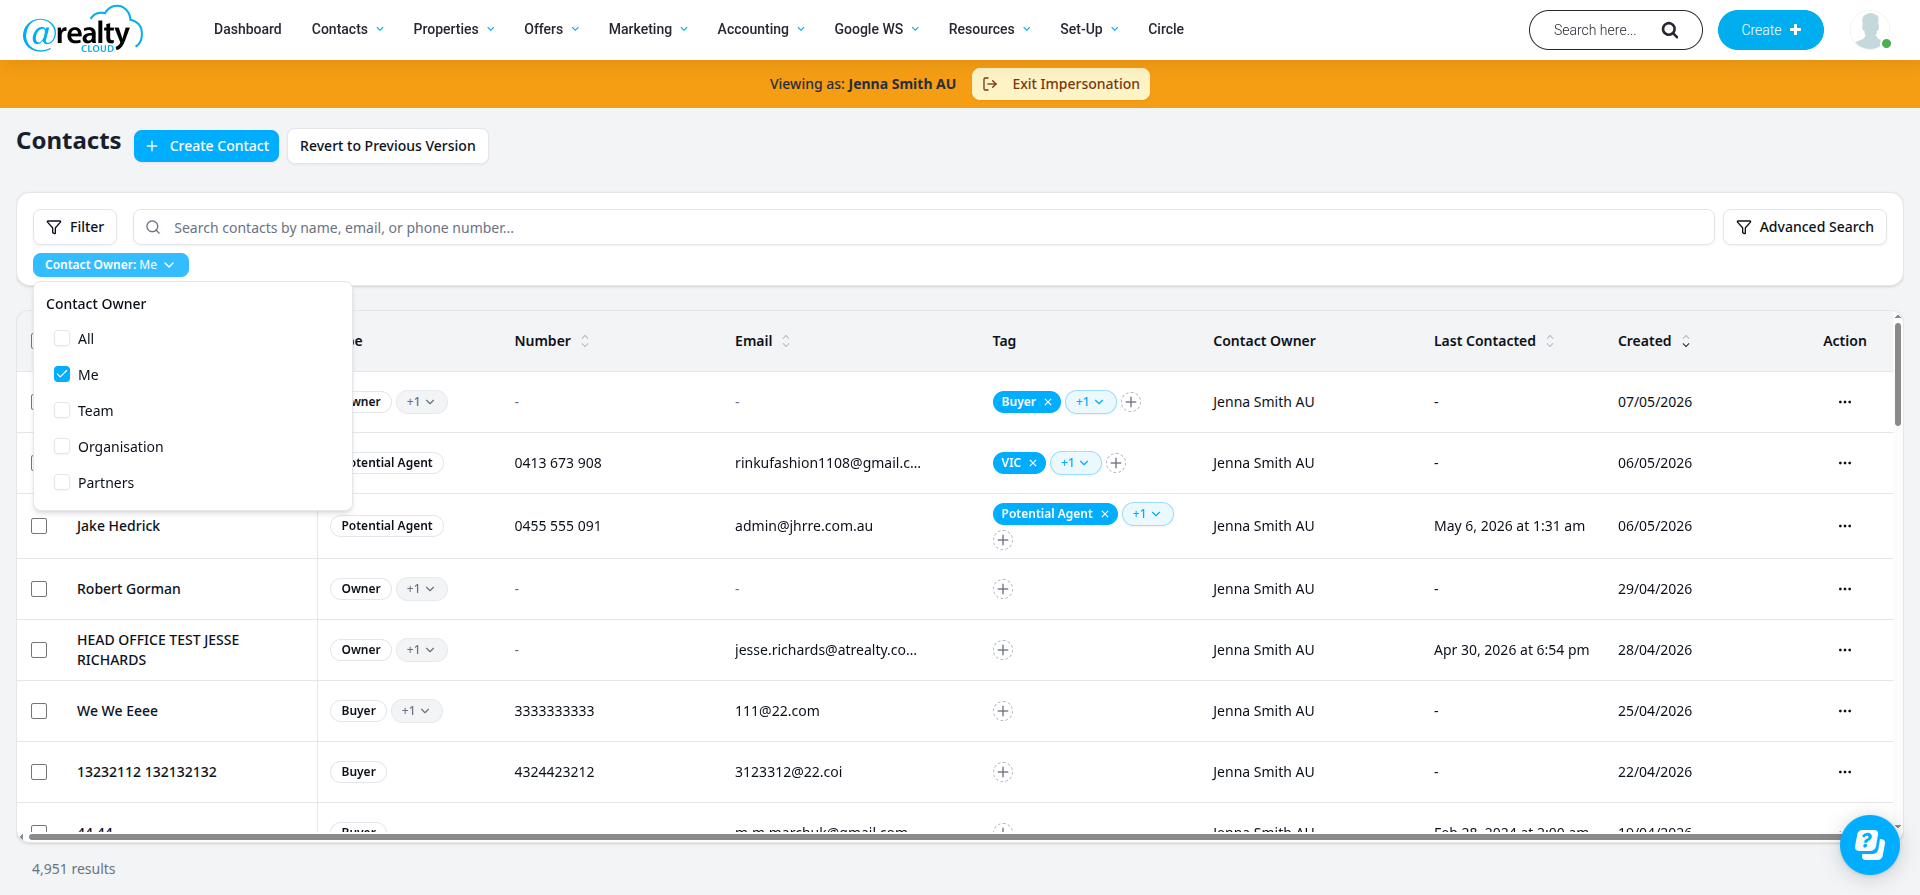
If Partner Agents is selected, then the Contacts that are owned by team members and other agents outside of the team are displayed. This can include Contacts that are associated to listing records that multiple agents are a part of (co-listings and conjunctions) including Vendors and Contacts created from enquiries.
Filters
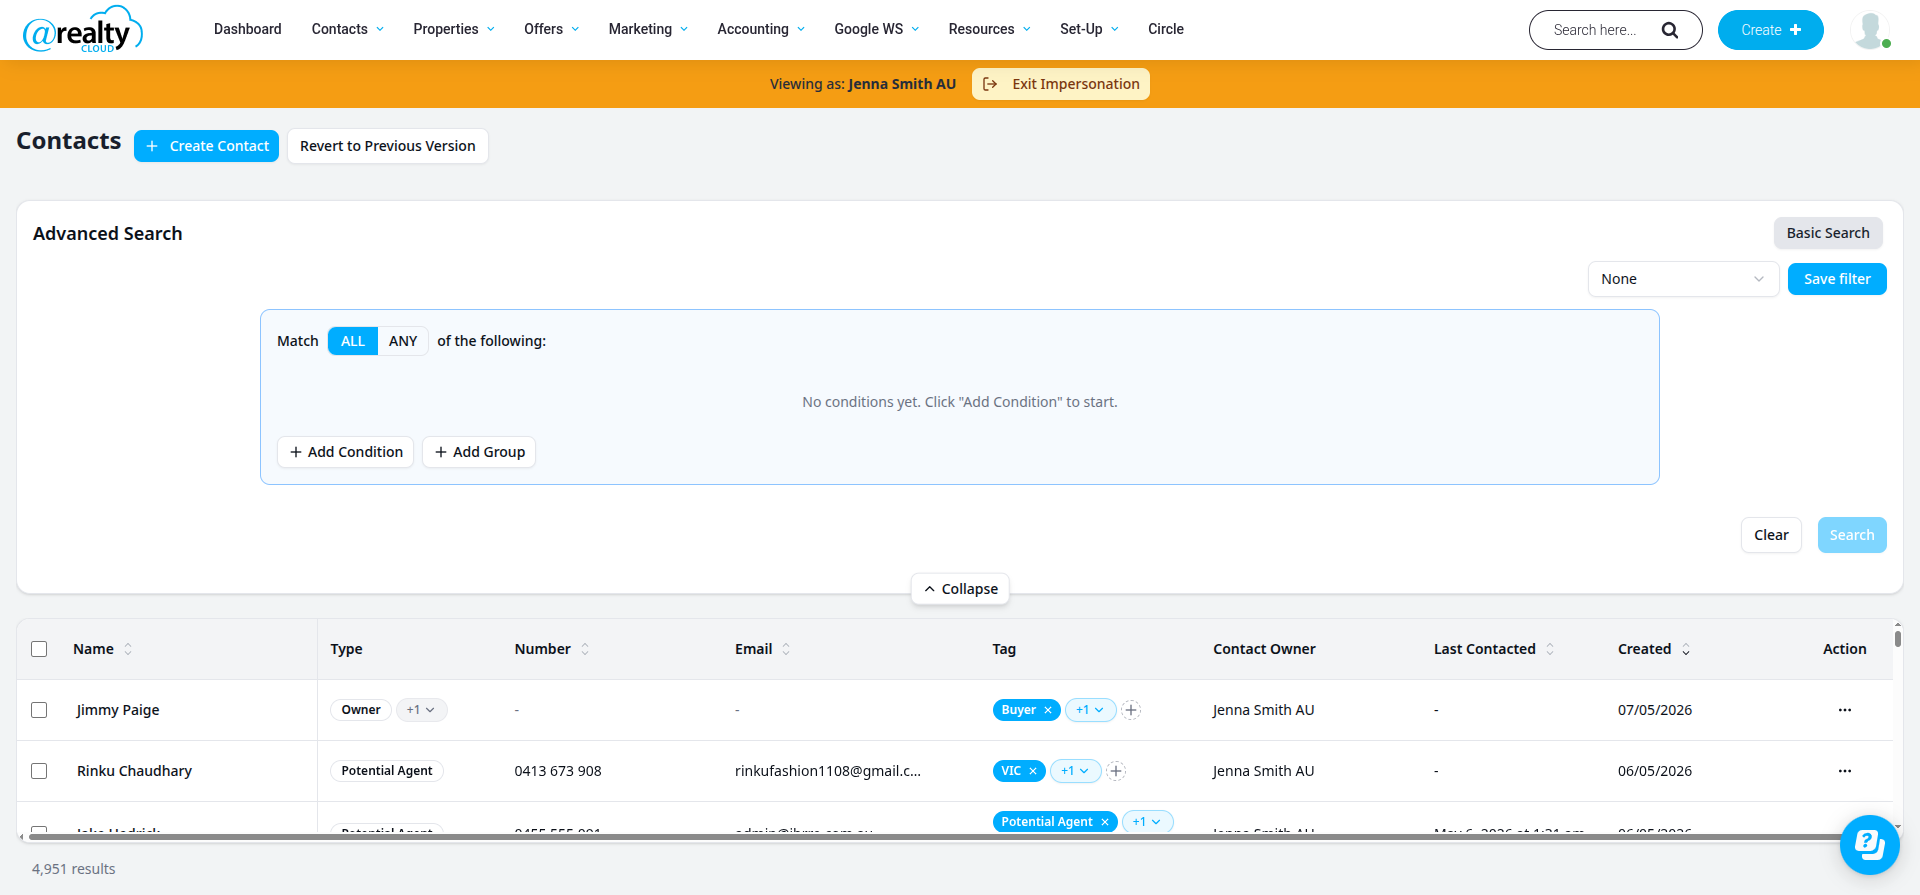
Clicking the Advanced Search button on the right of the search box opens the Advanced Search builder. The builder allows the User to combine fields and operators in detail, switch between Match ALL (AND) and Match ANY (OR) logic, nest groups, and save filter sets for re-use.
For details on each filter and operator, see the Contacts Filters section below.
Adding Tags
To add a tag to the Contact, the User can click on the + button in the Tag column. An equivalent Add tag pencil icon also appears when the User hovers over a row — both open the same Tag picker.
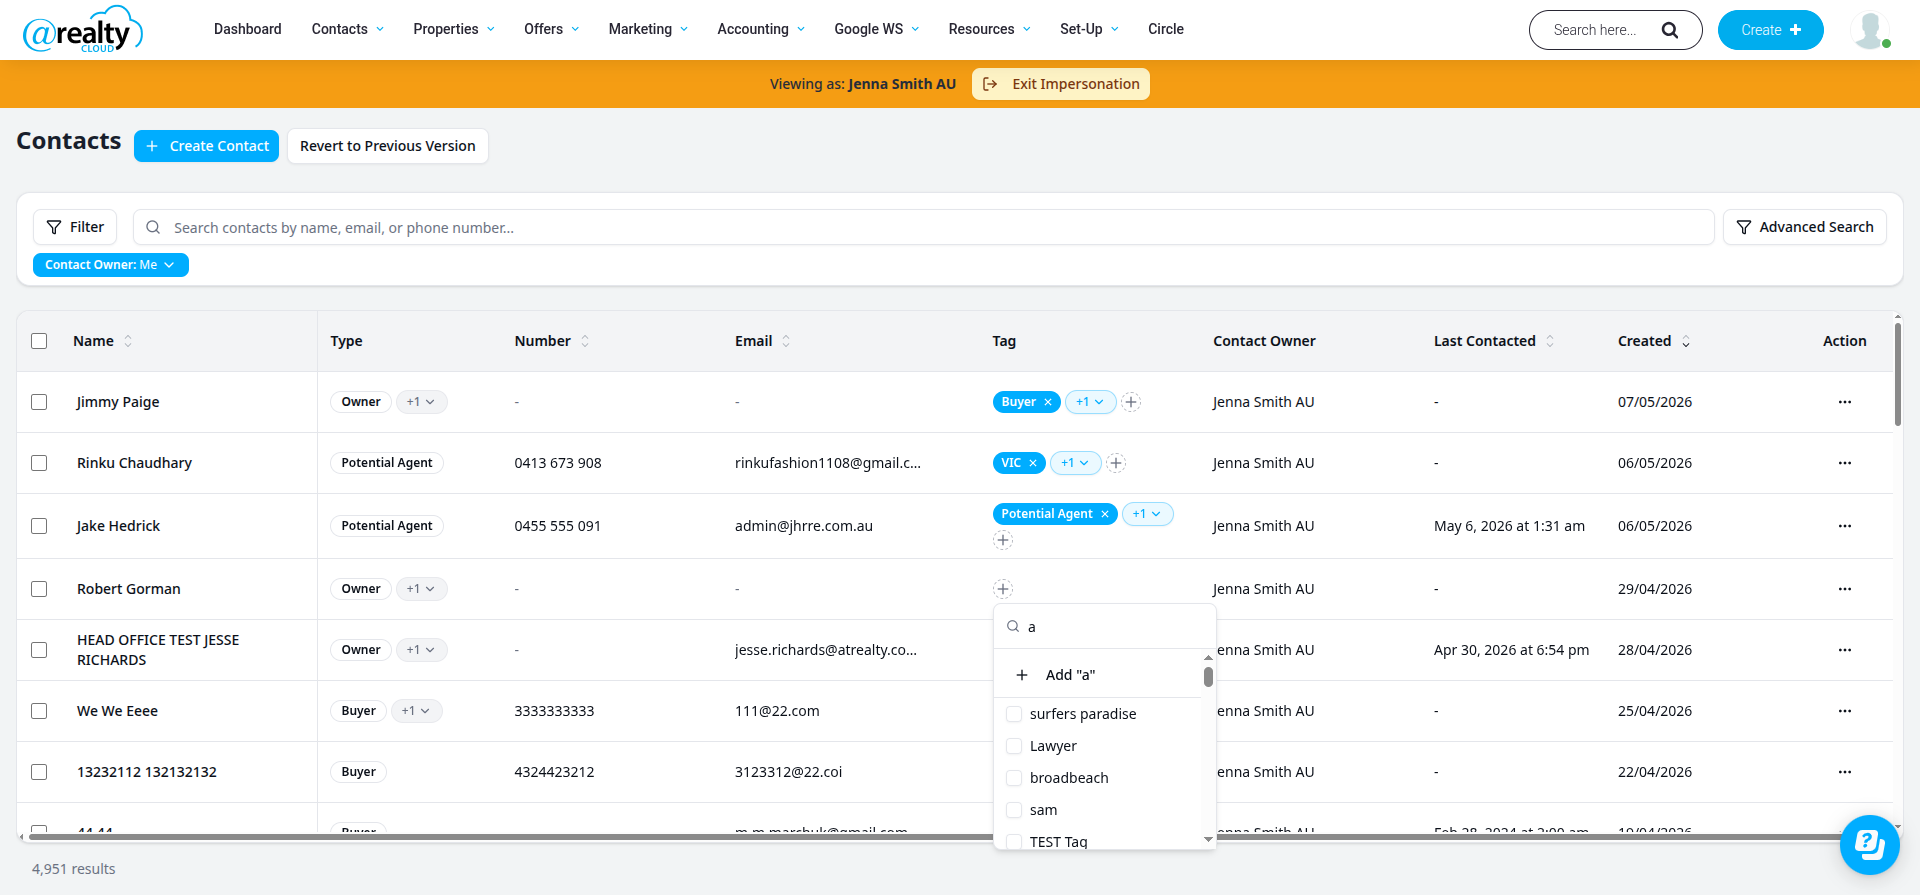
The Tag picker shows a Search tags… input and a checkbox list of the organisation’s existing tags. The User types to filter the list, then ticks each tag they want to apply.
Note: tags are picked from the existing organisation tag list. To add a brand-new tag that does not exist yet, the User needs to create the tag first in the organisation’s Tag setup.
Contact List View Actions
Summary
This section covers the contact-level actions available on the new CRM Contacts page at https://myatrealty.com/v2/crm/contacts. These include creating a Contact, the per-row Action menu, and switching to the previous version of the Contacts page.
For bulk actions (mass SMS, mass Email, HTML Email templates), the User can click Revert to Previous Version to return to the previous version of the Contacts page. Those flows are documented under “Old CRM Actions (Previous Version)” below.
Create Contact
The User can create a new Contact by clicking the + Create Contact button at the top of the Contacts page. This opens the Add New Contact modal.
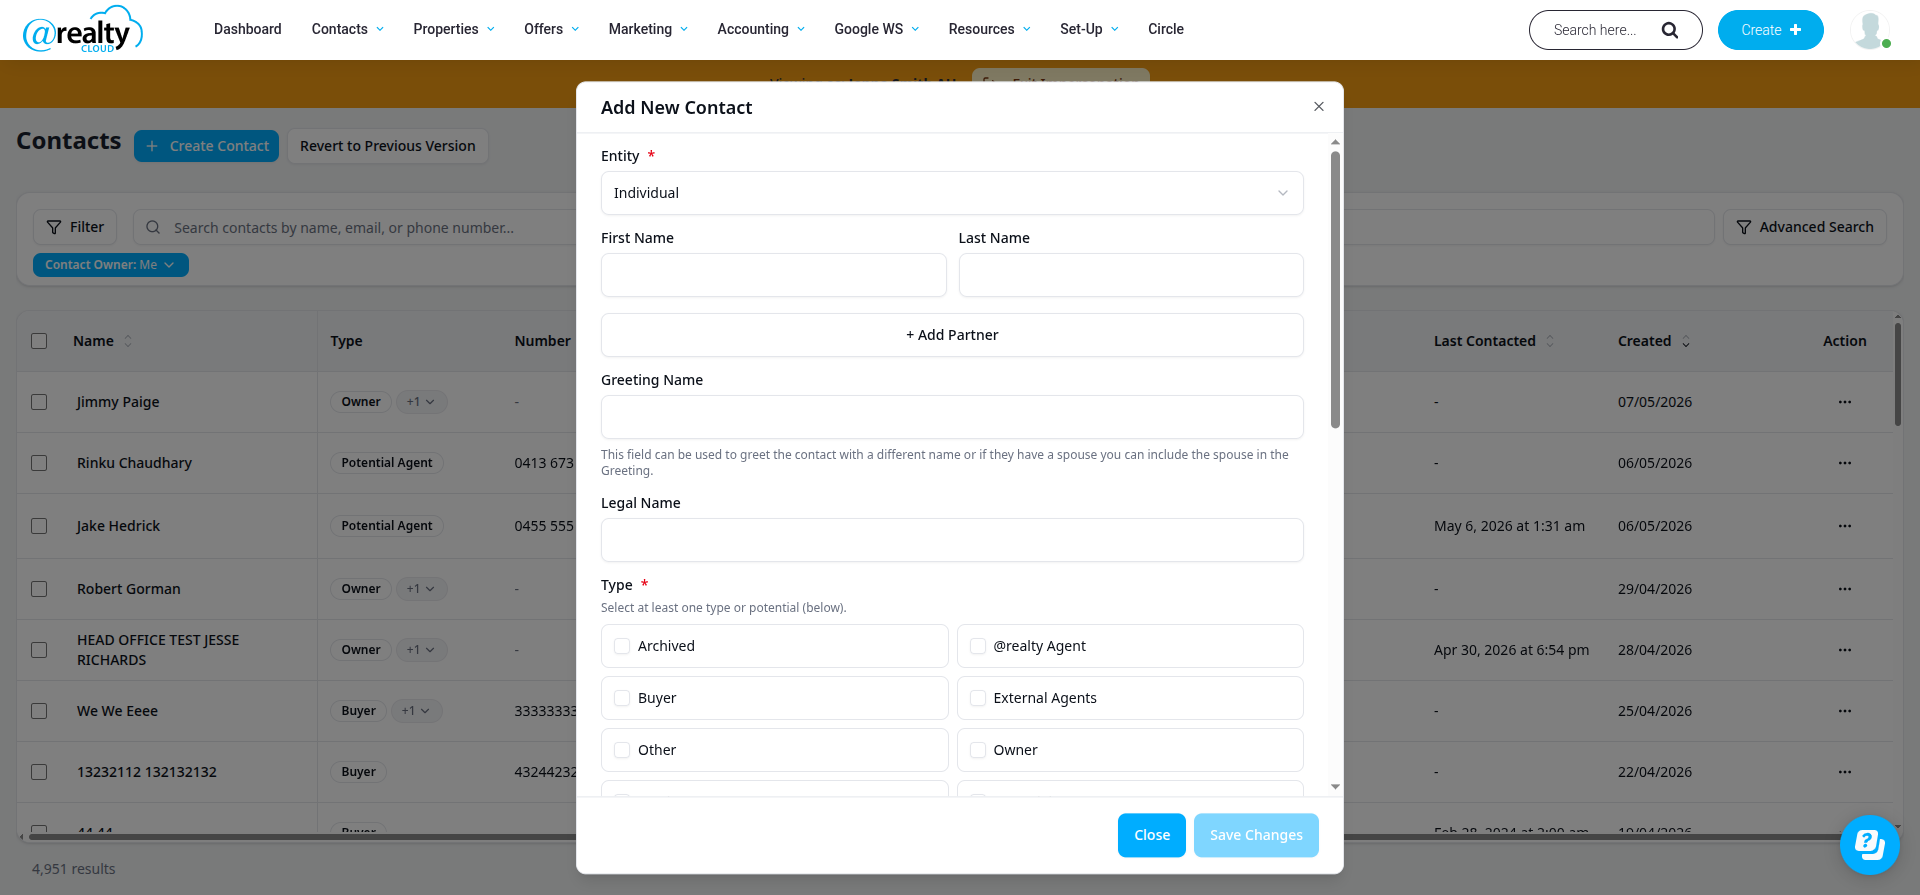
The modal fields are:
- Entity — Individual (default) or Business.
- First Name and Last Name — required.
- + Add Partner — adds an additional individual to the Contact record.
- Greeting Name and Legal Name — optional name variants.
- Type — multi-select checkbox list: Archived, @realty Agent, Buyer, External Agents, Other, Owner, Previous Owner, Potential Agent, Solicitor, Tenant, Vendor.
- Potential — radio options: Looking to Buy or Looking to Sell.
- Primary Email + Email Type — the Contact’s primary email and its type label.
- Primary Phone (with country flag) + Phone Type — the Contact’s primary phone number and its type label.
- Tags — pick tags from the organisation’s existing tag list.
- Note — free-text note for the Contact.
Clicking Save Changes creates the Contact and adds it to the table.
Editing a Contact from the table
The User can edit a Contact’s details directly from the Contacts table using either the … action menu in the Action column, or inline pencil icons that appear when hovering over a row.
The … action menu
Each row in the Contacts table has an Action column with a … (ellipsis) menu. Clicking the … opens a small menu with three options:
- View — opens the Contact’s full record page.
- Edit emails — opens the Contact Emails modal.
- Edit numbers — opens the Contact Numbers modal.
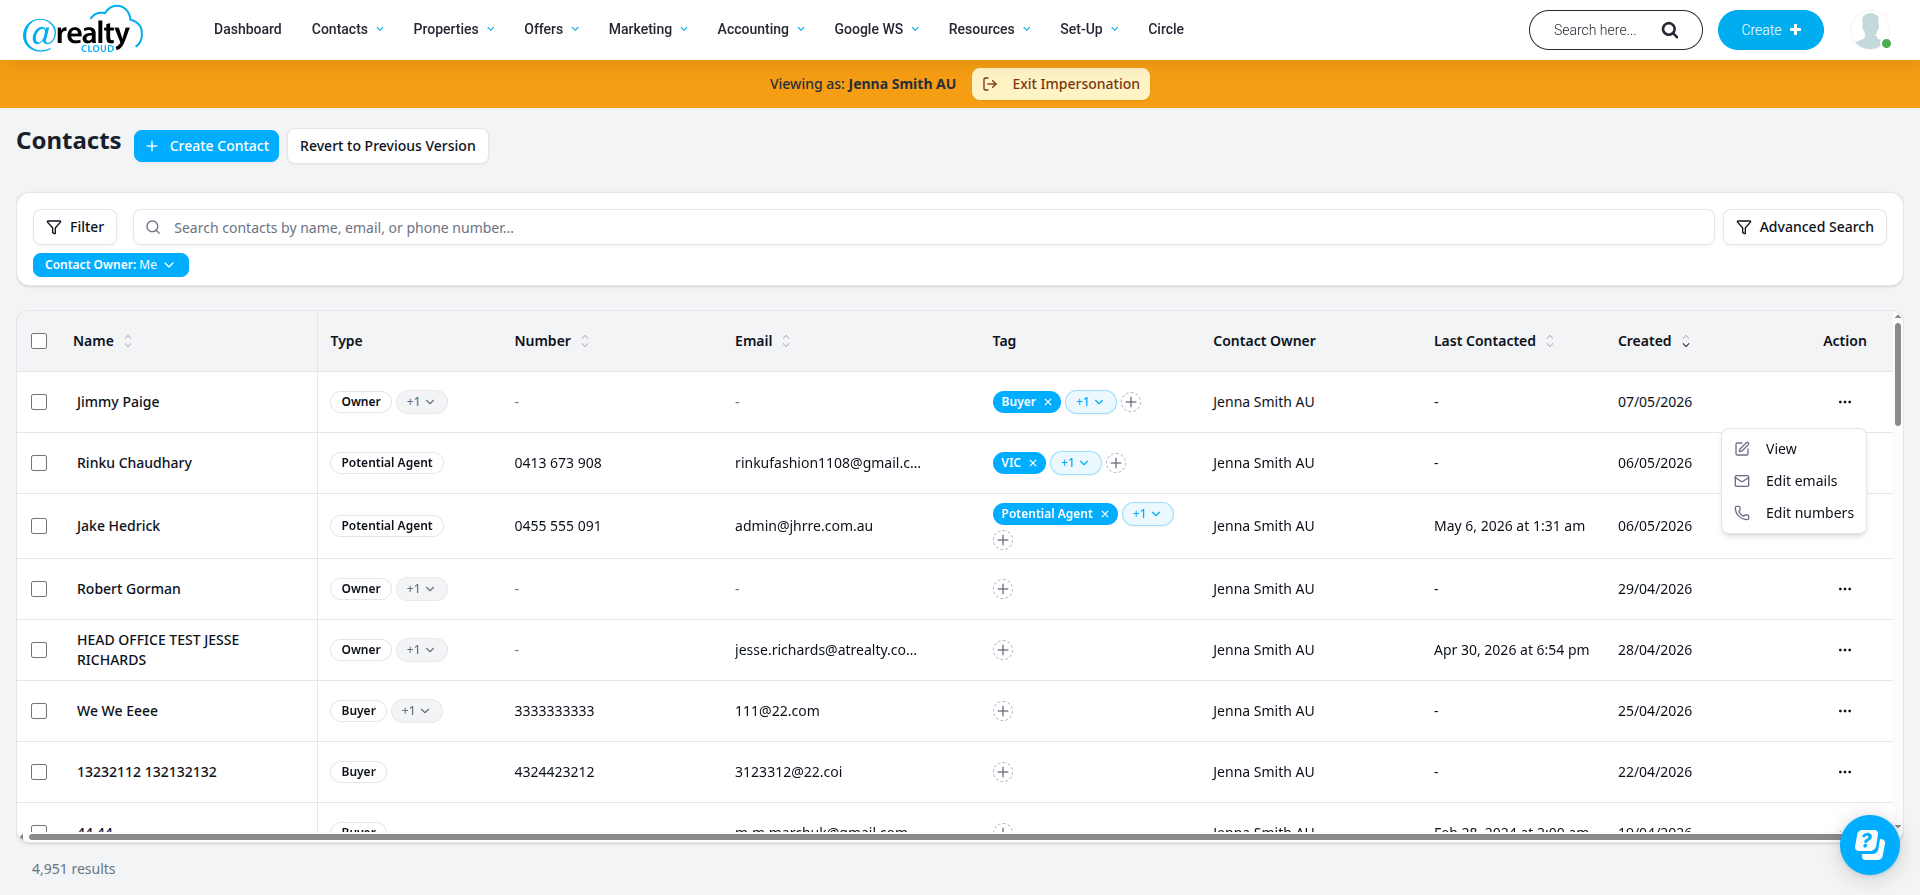
Hover edit icons
When the User hovers over a row, four small pencil icons appear alongside specific column values:
- Edit contact types — appears next to the Type column. Opens the contact type editor.
- Edit contact numbers — appears next to the Number column. Opens the Contact Numbers modal (same as the … menu’s Edit numbers).
- Edit contact emails — appears next to the Email column. Opens the Contact Emails modal (same as the … menu’s Edit emails).
- Add tag — appears next to the Tag column. Opens the Tag picker (same as the + button in the Tag column).
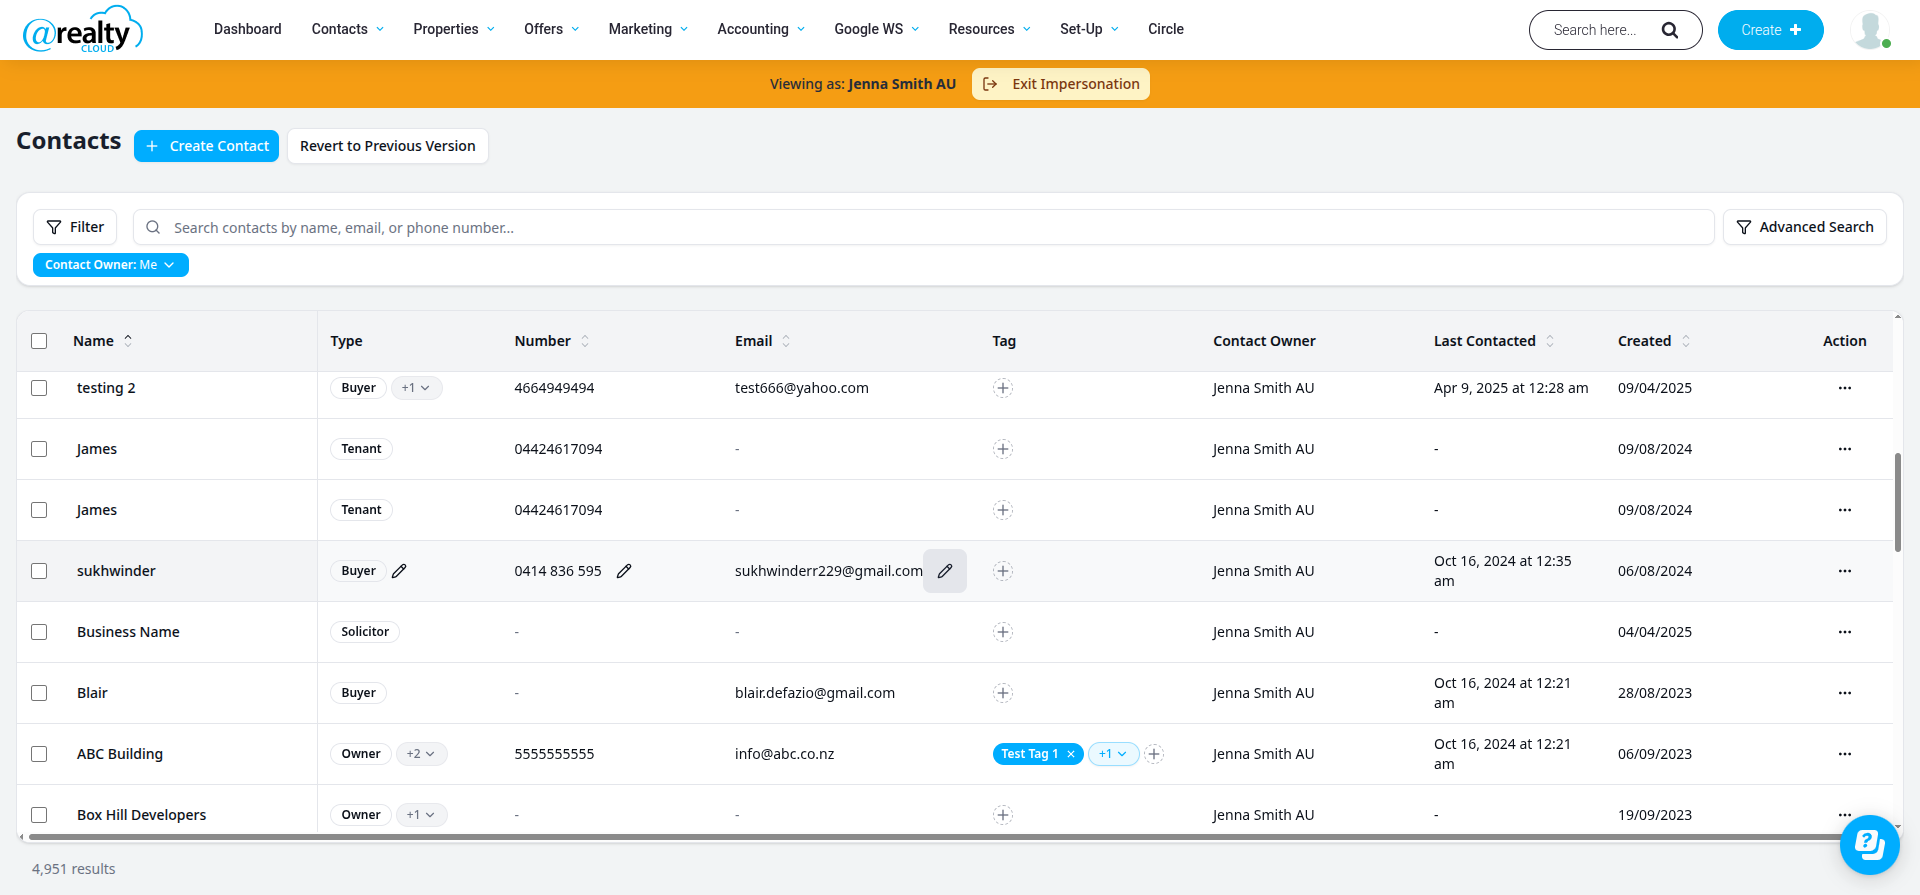
Note: the hover icons disappear when the cursor leaves the row. They are a quick shortcut for the same flows that the … menu and the + Tag button offer.
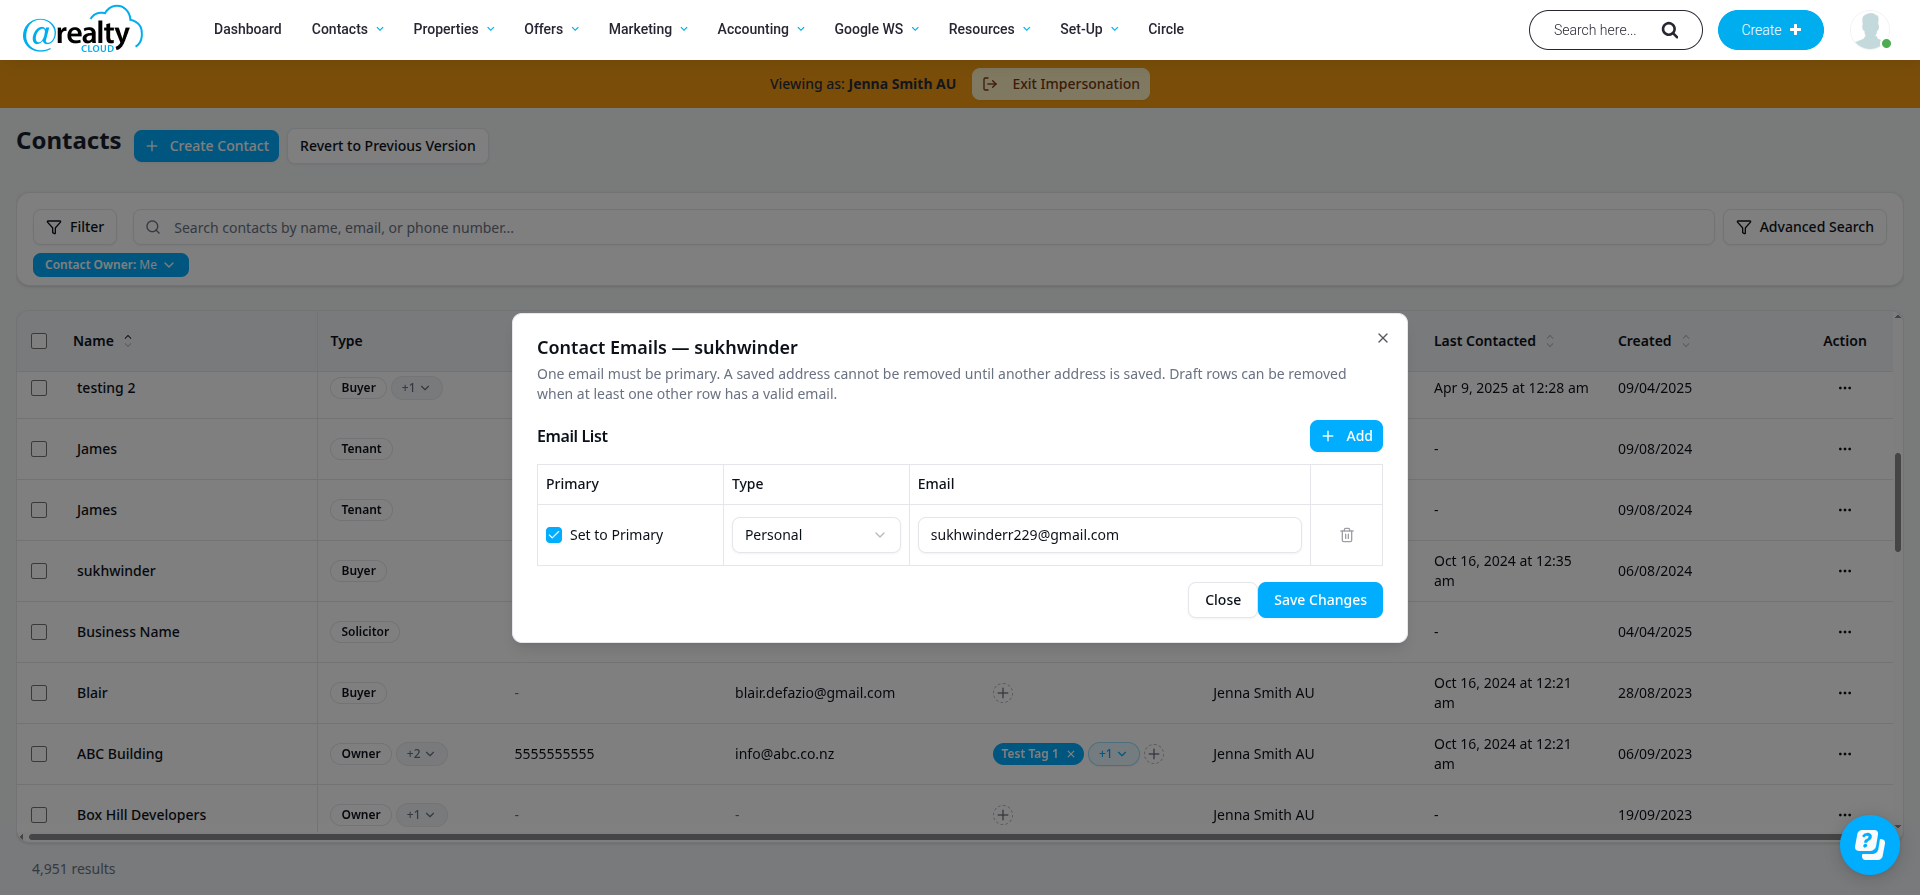
Contact Emails modal
Opened via Edit emails (… menu) or the Edit contact emails hover icon. The title shows the Contact’s name (e.g. Contact Emails — sukhwinder).
The modal contains an Email List table with one row per email address:
- Primary checkbox — exactly one email must be Primary
- Type — combobox (default Personal)
- Email — text input
- A Remove email button per row
An Add button at the top adds a new draft row. Click Save Changes to save, or Close to discard.
Note: one email must remain Primary. A saved email cannot be removed until another saved email exists on the Contact. Draft rows can be removed if at least one other row has a valid email.
Contact Numbers modal
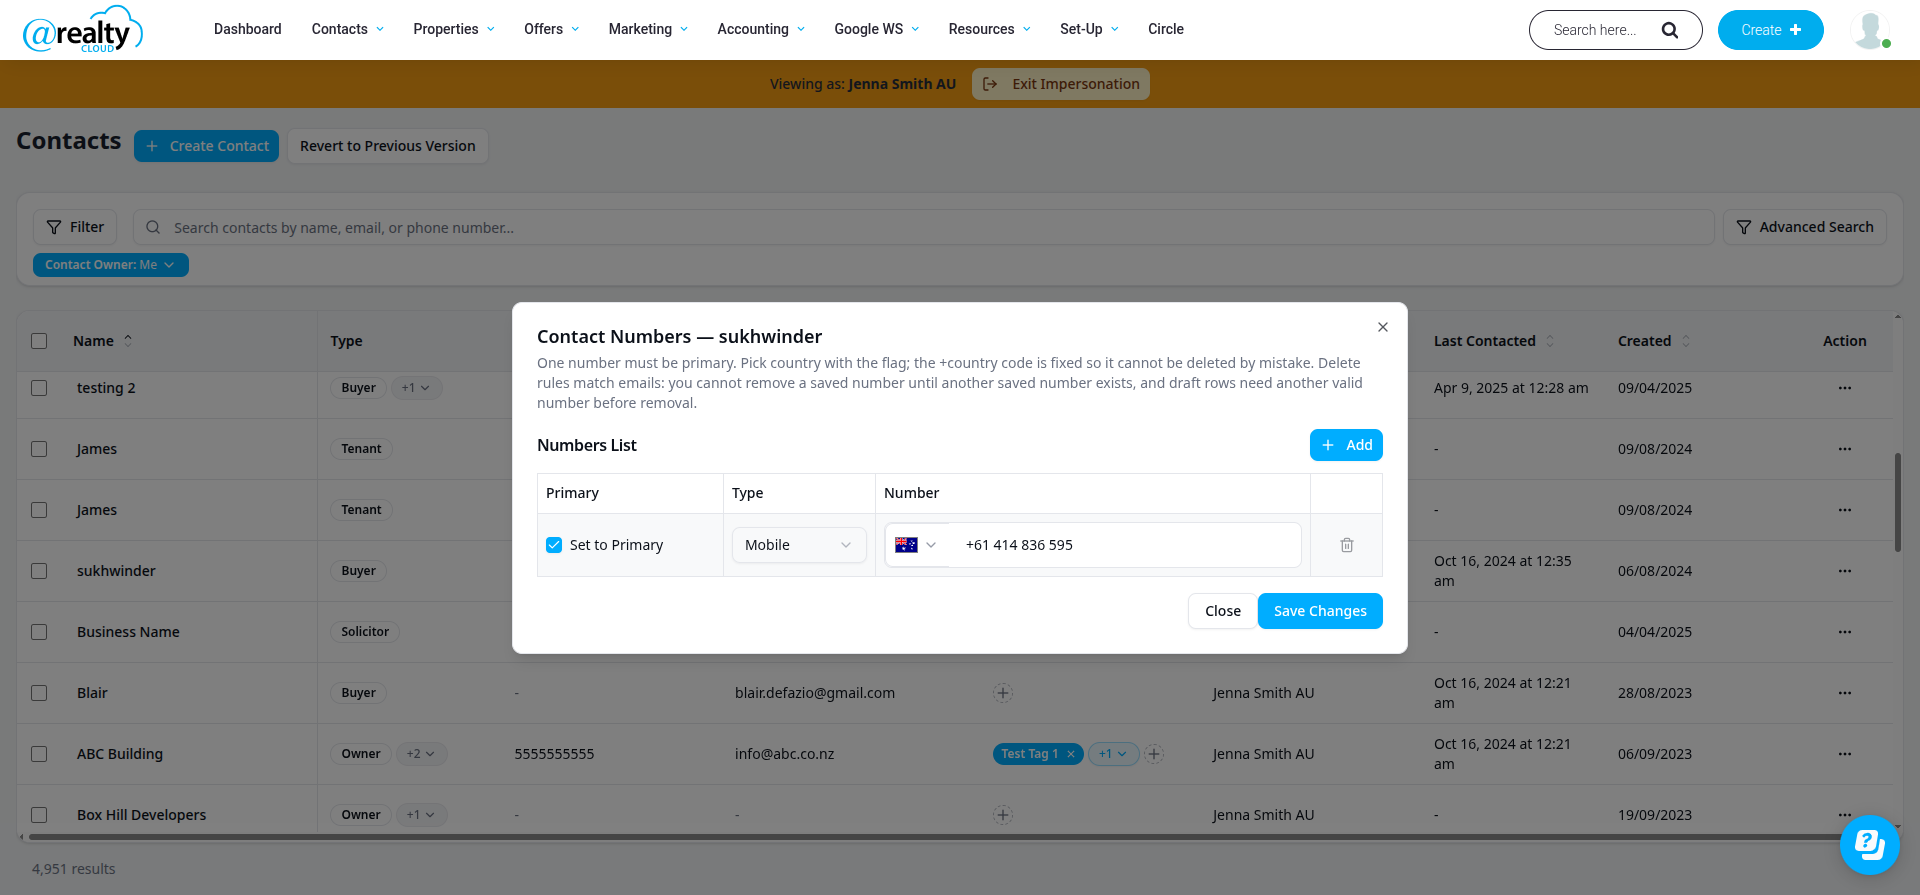
Opened via Edit numbers (… menu) or the Edit contact numbers hover icon. The title shows the Contact’s name (e.g. Contact Numbers — sukhwinder).
The modal contains a Numbers List table with one row per phone number:
- Primary checkbox — exactly one number must be Primary
- Type — combobox (default Mobile)
- Number — country flag picker + phone number text input. The phone is stored in E.164 format (e.g. +61 414 836 595).
- A Remove number button per row
An Add button at the top adds a new draft row. Click Save Changes to save, or Close to discard.
Note: pick the country with the flag picker — the +country code is fixed once selected so it cannot be deleted by mistake. The same Primary-required and remove rules as the Emails modal apply.
Note: bulk actions (SMS, Email, HTML Email) that were available on the Old CRM Actions menu are not available on the new CRM Contacts page. For those flows, use Revert to Previous Version (below) to switch back to the previous version of the page.
Revert to Previous Version
The Revert to Previous Version button at the top of the new Contacts page switches the page back to the previous (Old CRM) Contacts view. This is useful when the User needs an action that is not yet available on the new CRM, such as bulk SMS or HTML email templates.
Old CRM Actions (Previous Version)
The actions below are available on the previous version of the Contacts page (accessed via Revert to Previous Version). They are documented here for reference until equivalent flows are available on the new CRM Contacts page.
When the User selects at least one contact on the previous Contacts page, the Actions button will turn green to indicate that it can be used.
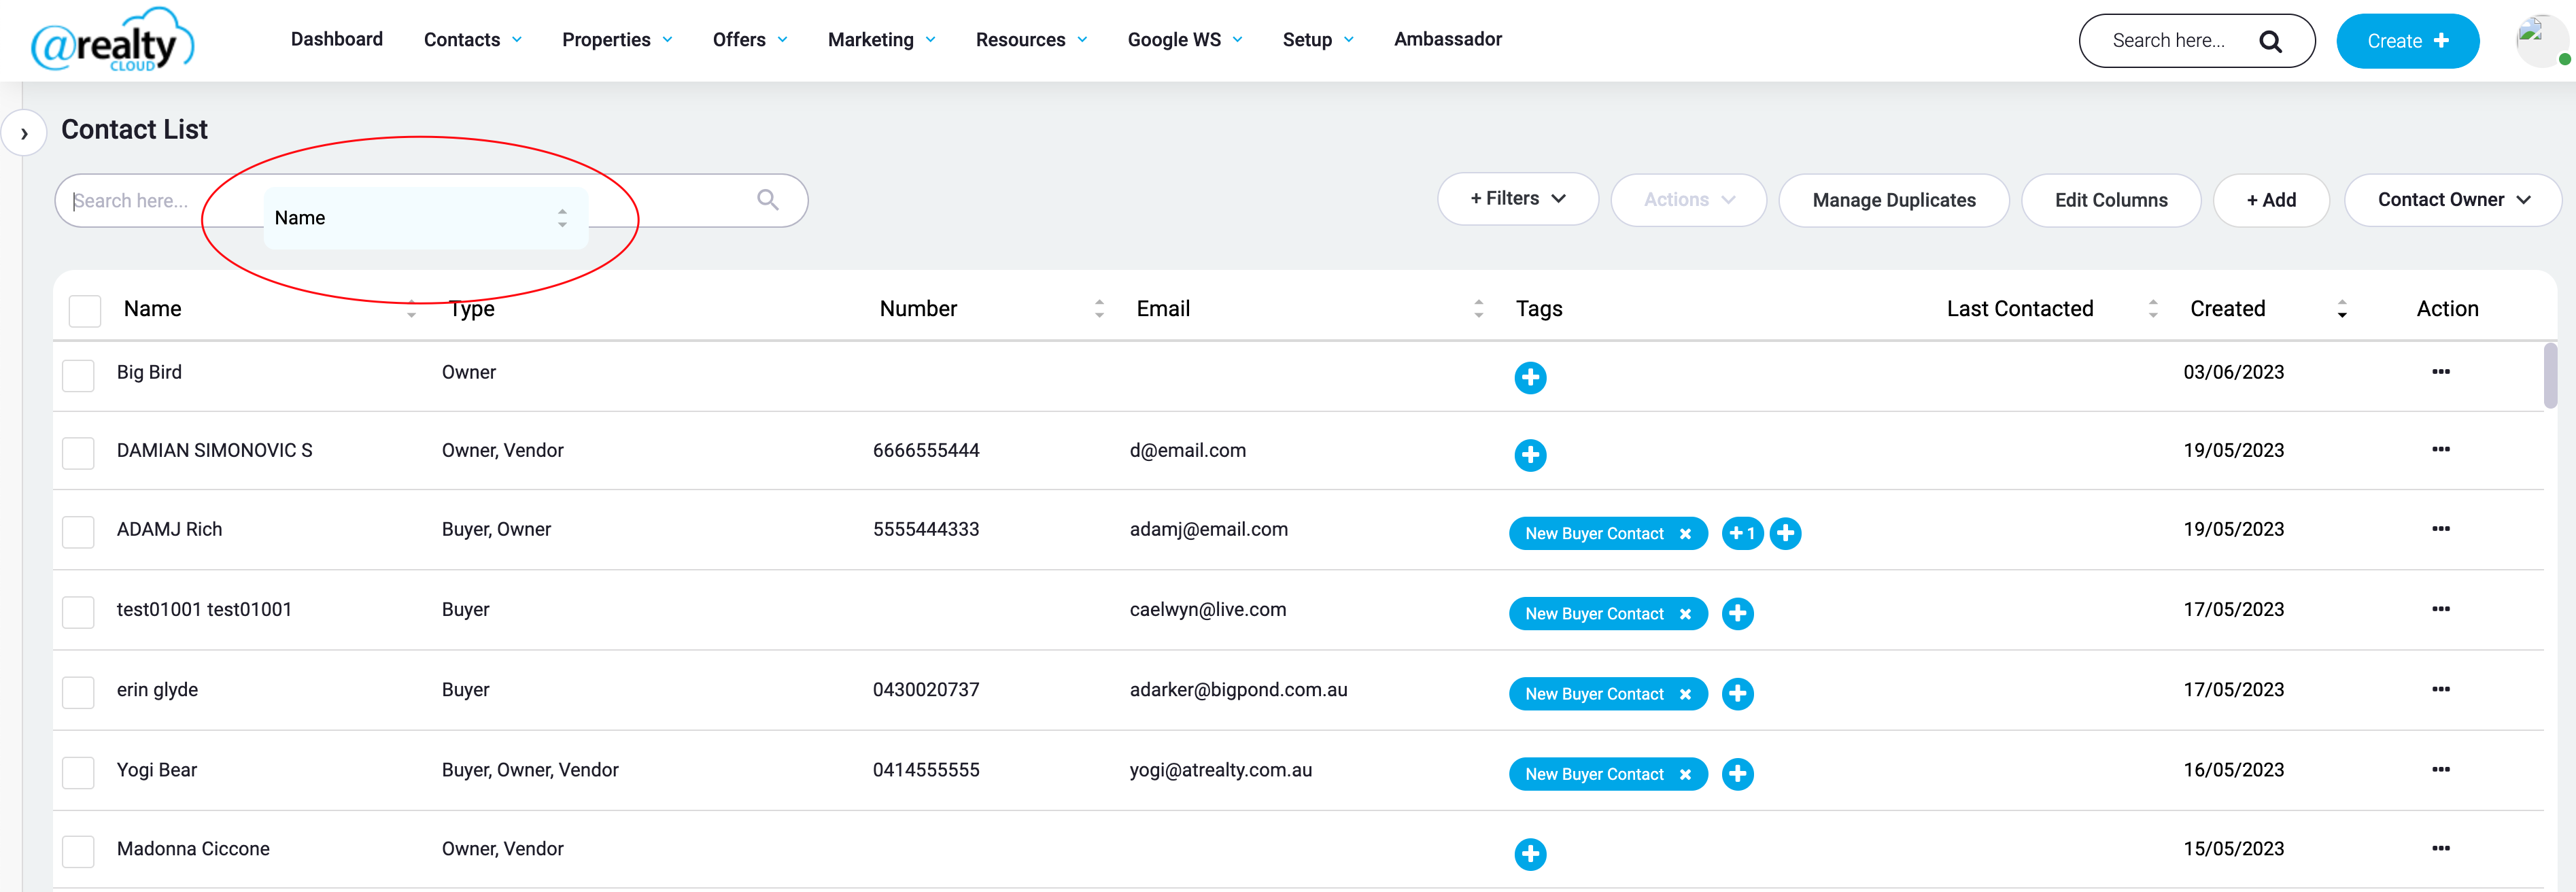
This allows the User to send notifications to a segment of their database by using filters, or to update that segment of the database.
SMS
When Email is selected, the email pop up will display and the User can select a template to use or draft a new email.
The list of selected contacts will display in the To field, however the Contacts will receive the emails separately and the Contact merge fields will populate that specific Contact’s information once the email is sent.
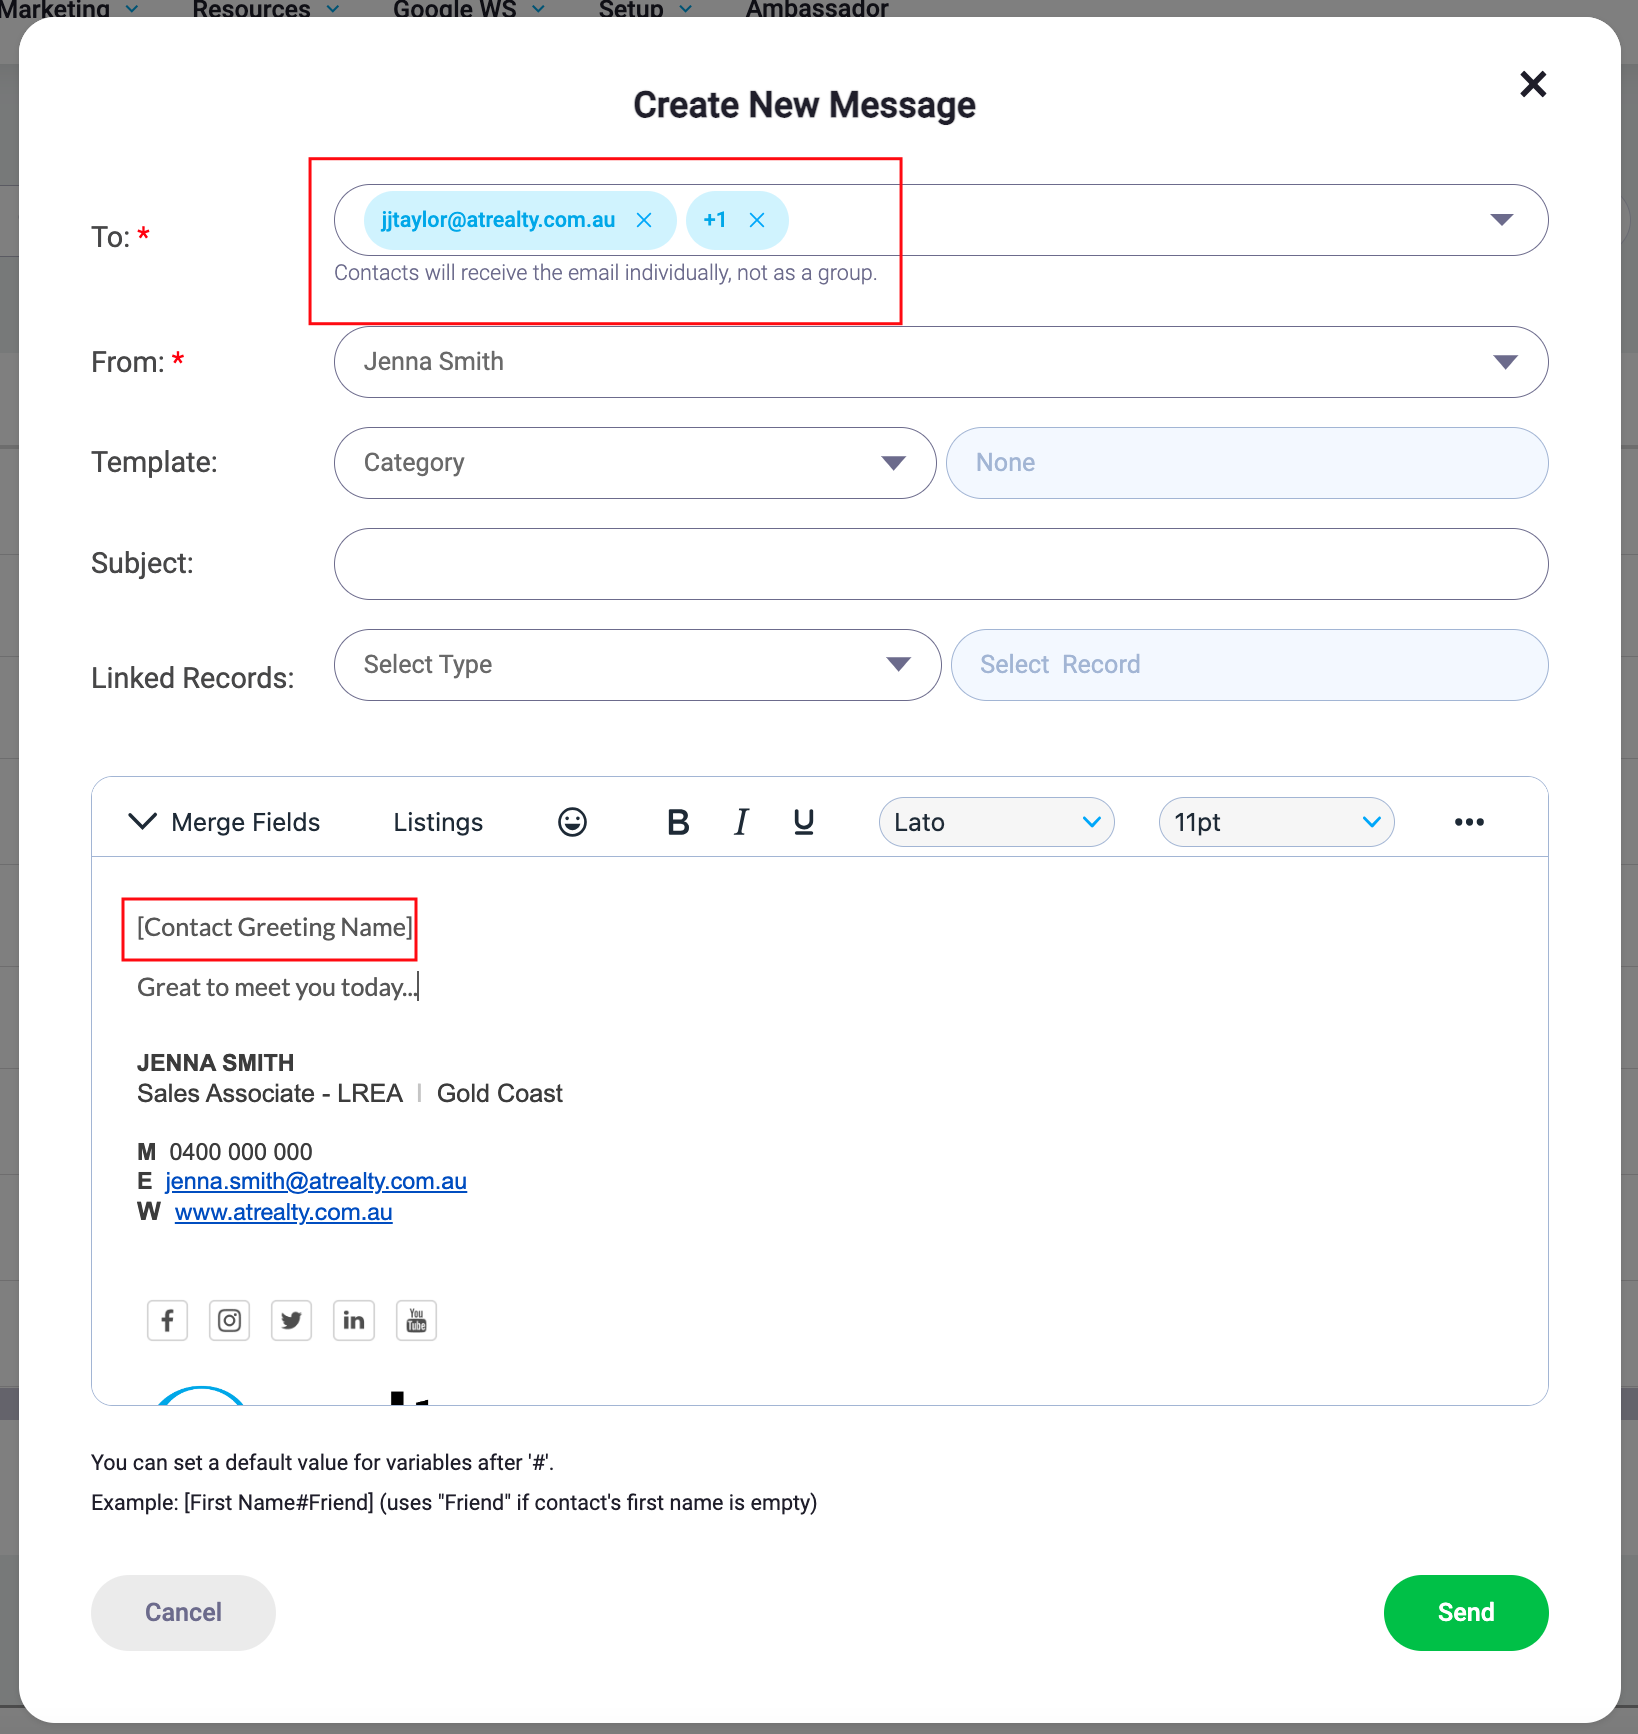
These emails are sent through Mailjet as Campaigns
HTML Email
You can send a HTML email template to Contacts from this screen. This will allow you to select the same templates that are available when sending a Mass Email.
The selected Contacts will display in the To field and you will also be able to enter email addresses as a CC or BCC.
Enter a Subject for the email.
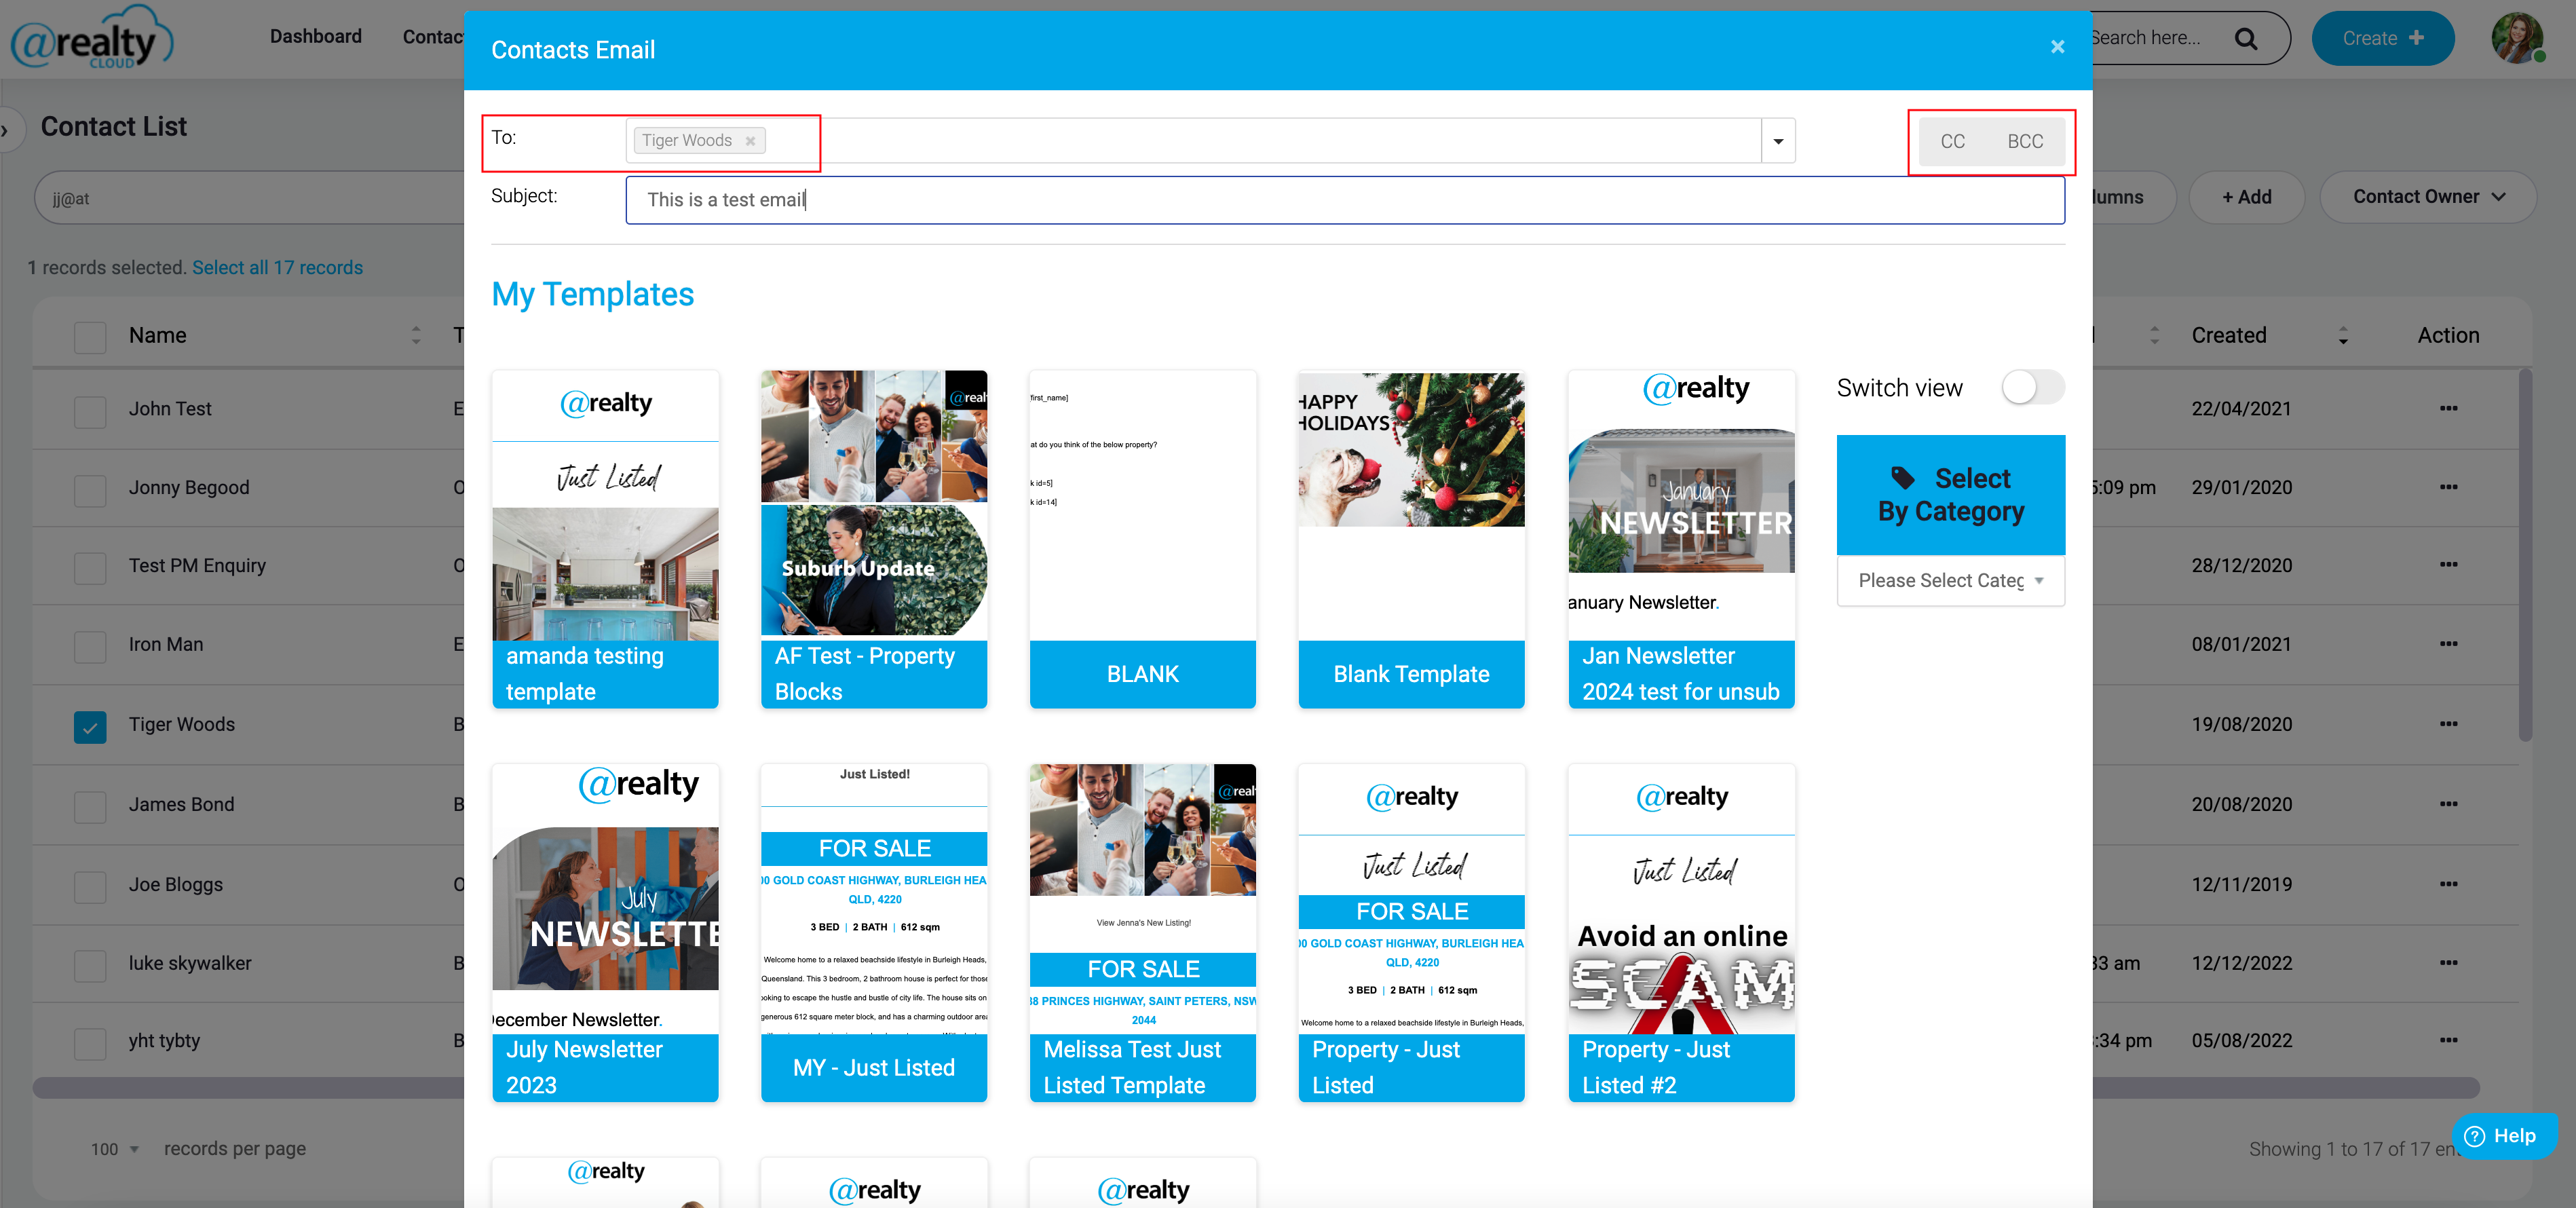
Then you can select one of the templates that you have already created
or duplicate an existing Head Office Template.
You can expand the edit view by clicking on the Expand button in the top right corner
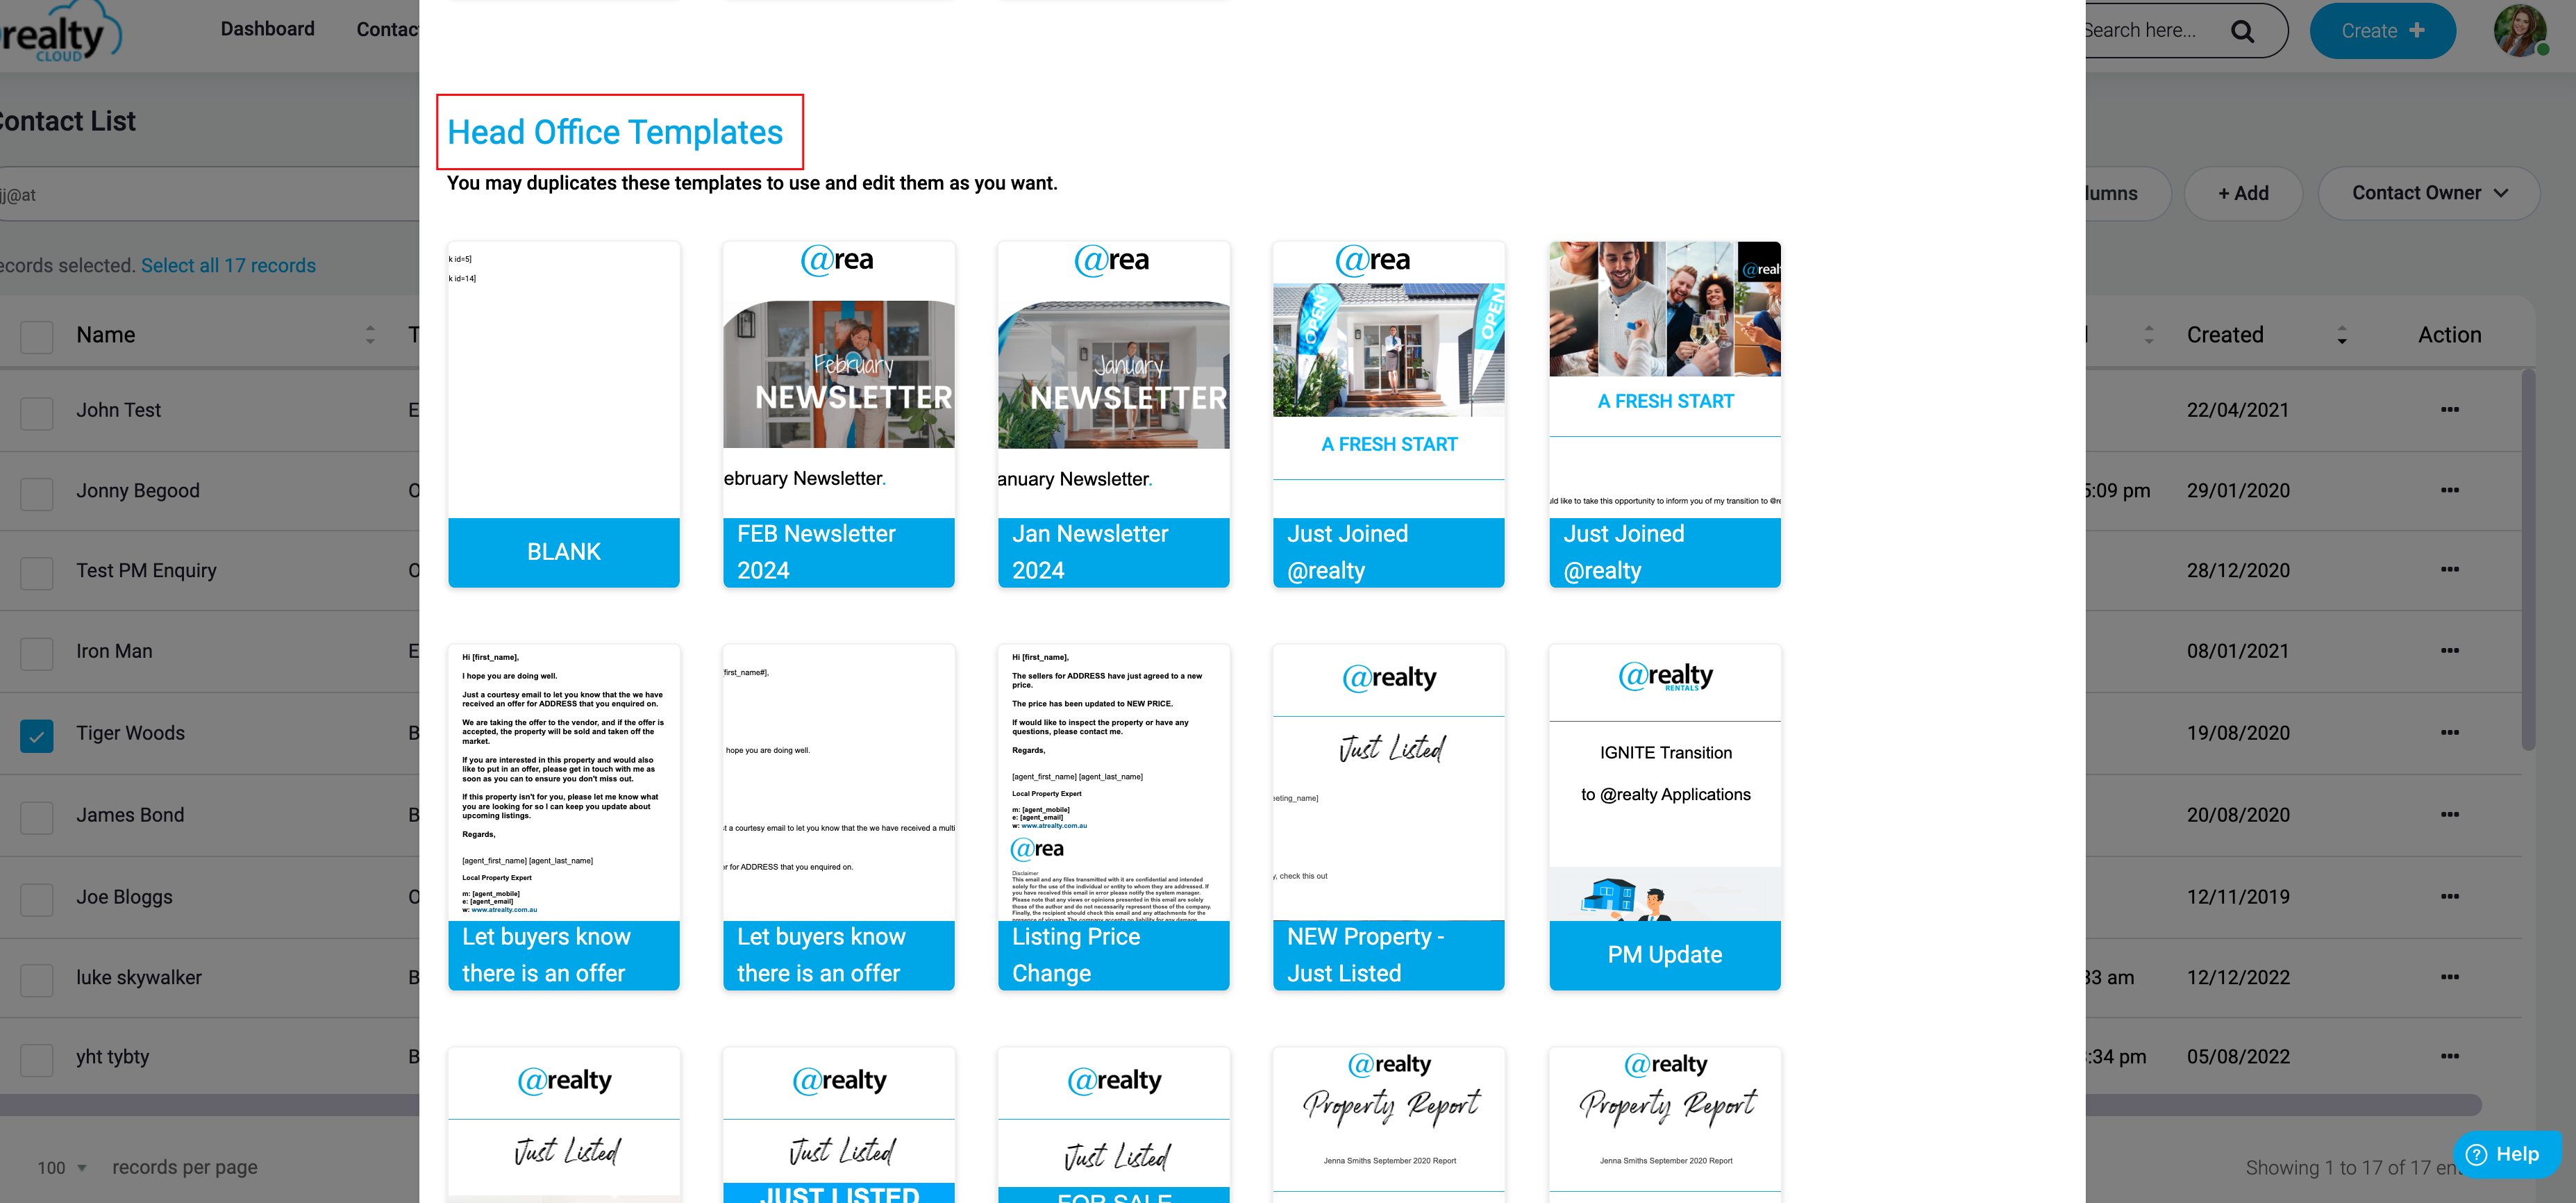
Then click Send when you are ready to send the email.
The email will be stored in the Contact Record’s Activities
Contacts Filters
What are filters?
Filters help find Contacts based on specific characteristics such as addresses, emails, enquiry details, tags and more.
How to use filters?
The new CRM Contacts page at https://myatrealty.com/v2/crm/contacts has two filter entry points above the table:
- The Filter button on the left of the search box opens the Filter quick panel.
- The Advanced Search button on the right of the search box opens the Advanced Search builder.
The User can also click Revert to Previous Version on the new Contacts page to return to the previous version, which uses the Filter UI documented under “Old CRM Filter UI (Previous Version)” below.
Filter Quick Panel
The Filter quick panel has five sections:
- Type — filter Contacts by their type (Buyer, Owner, Vendor, etc.)
- Tags — filter by Tags applied to the Contact
- Contact Owner — filter by who owns the Contact (Me, Partner Agents, etc.)
- Country — filter by country (Australia or New Zealand)
- Status — filter by Contact Status
Each section opens as its own popover when clicked — only one section is open at a time.
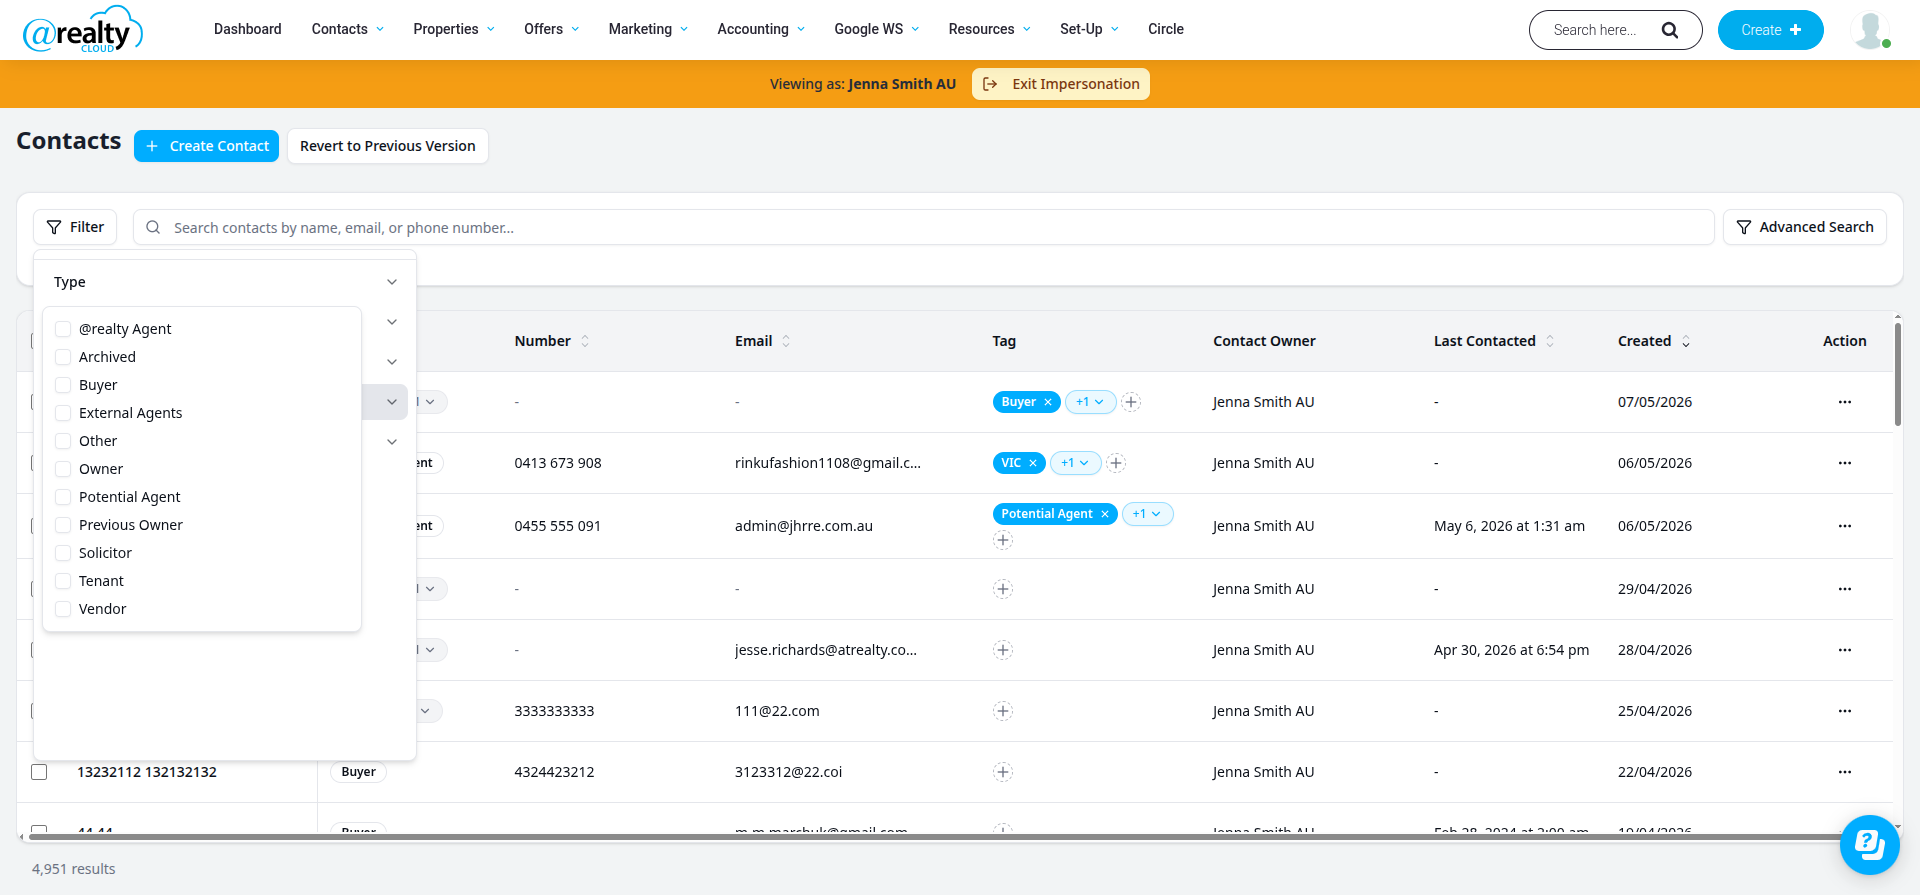
The Filter quick panel also has:
- A Saved filters dropdown for picking a saved filter set
- A Save filter button for saving the current filter selections as a re-usable set
The builder supports:
- Multiple conditions combined with Match ALL (AND) or Match ANY (OR) logic
- Nested groups via the Add Group button for more complex queries
- Saved filters with their own Saved filters dropdown and Save filter button
- A wide range of fields organised into 9 groups (see below)
Available Fields
The Advanced Search field picker groups available fields:
| Group | Fields |
|---|---|
| Contact | Full Name, First Name, Last Name, Status, Archived, OK to Call, Email Subscribed, SMS Subscribed, Last Contacted Date, Created Date, Updated Date |
| Contact Emails | Email Address |
| Contact Numbers | Phone Number |
| Contact Addresses | Suburb, City, State, Postcode, Country, Full Address |
| Contact Types | Types |
| Tags | Tags |
| Activity | Enquired, Inspections, Purchased |
| Property preferences | Reason, Property Type, Property Sub-Type, Property Status, Bed, Bath, Car, Price, Location, Preferences active |
| Properties | Owner of, Landlord of, Tenant of |
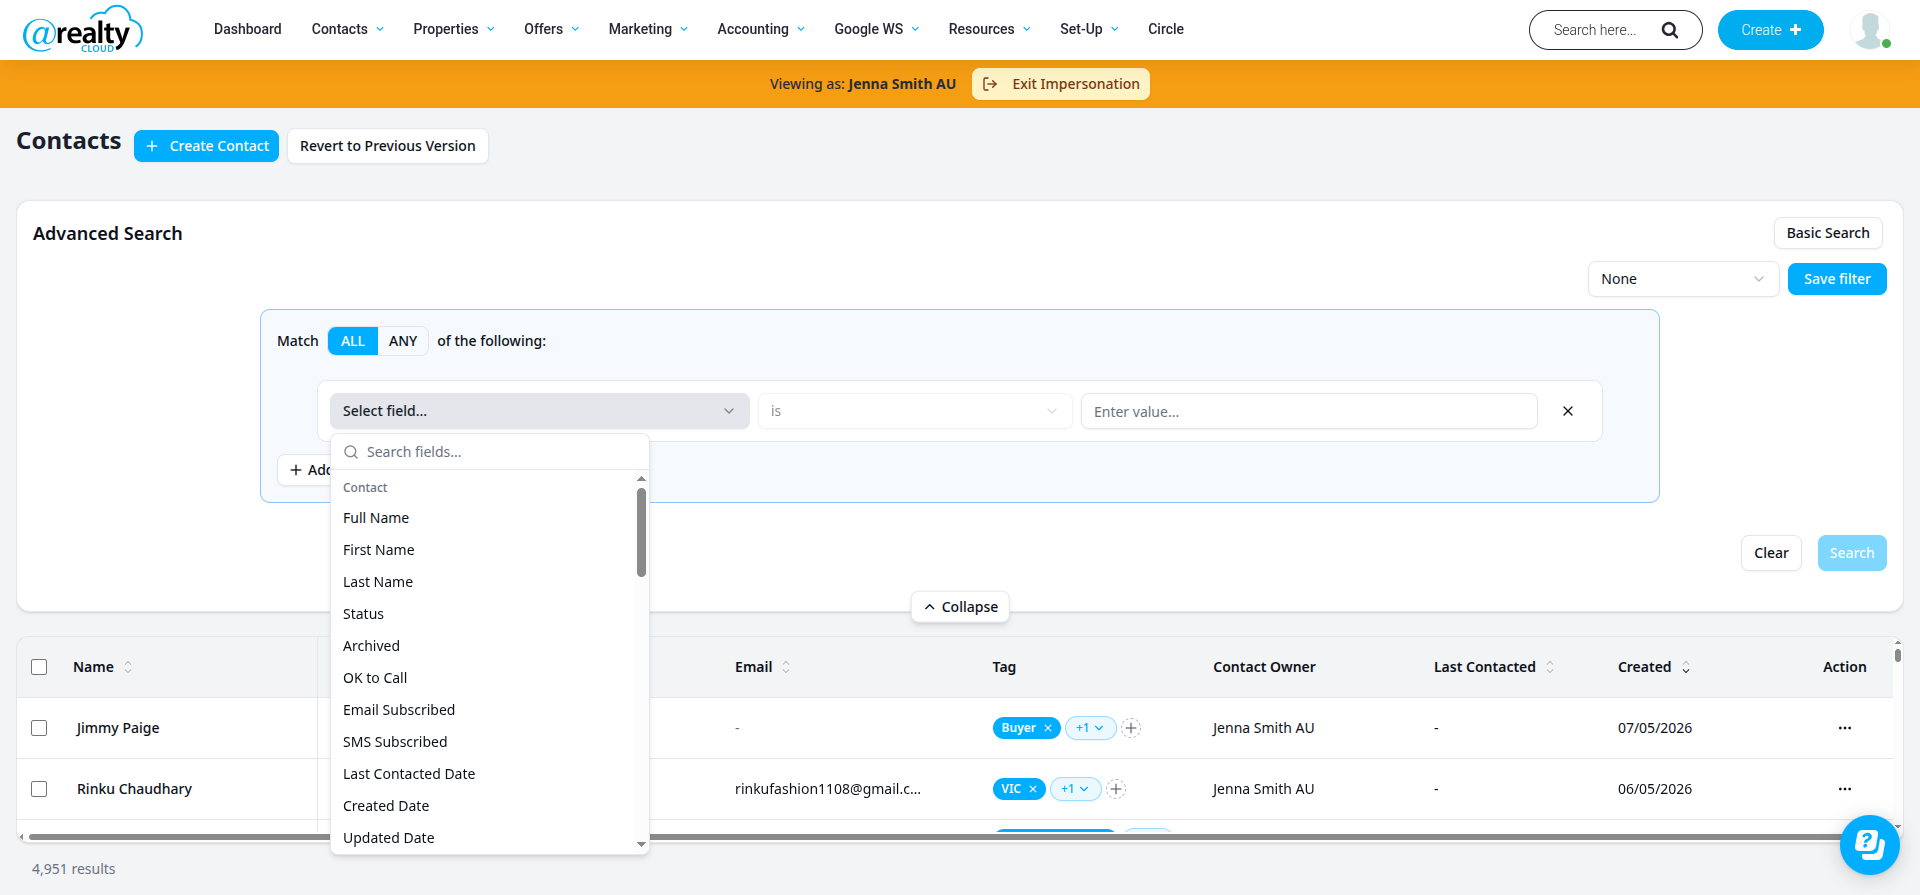
Operators
Each field exposes operators matched to its data type. For example, a text field like First Name exposes: is, is not, contains, does not contain, starts with, ends with.
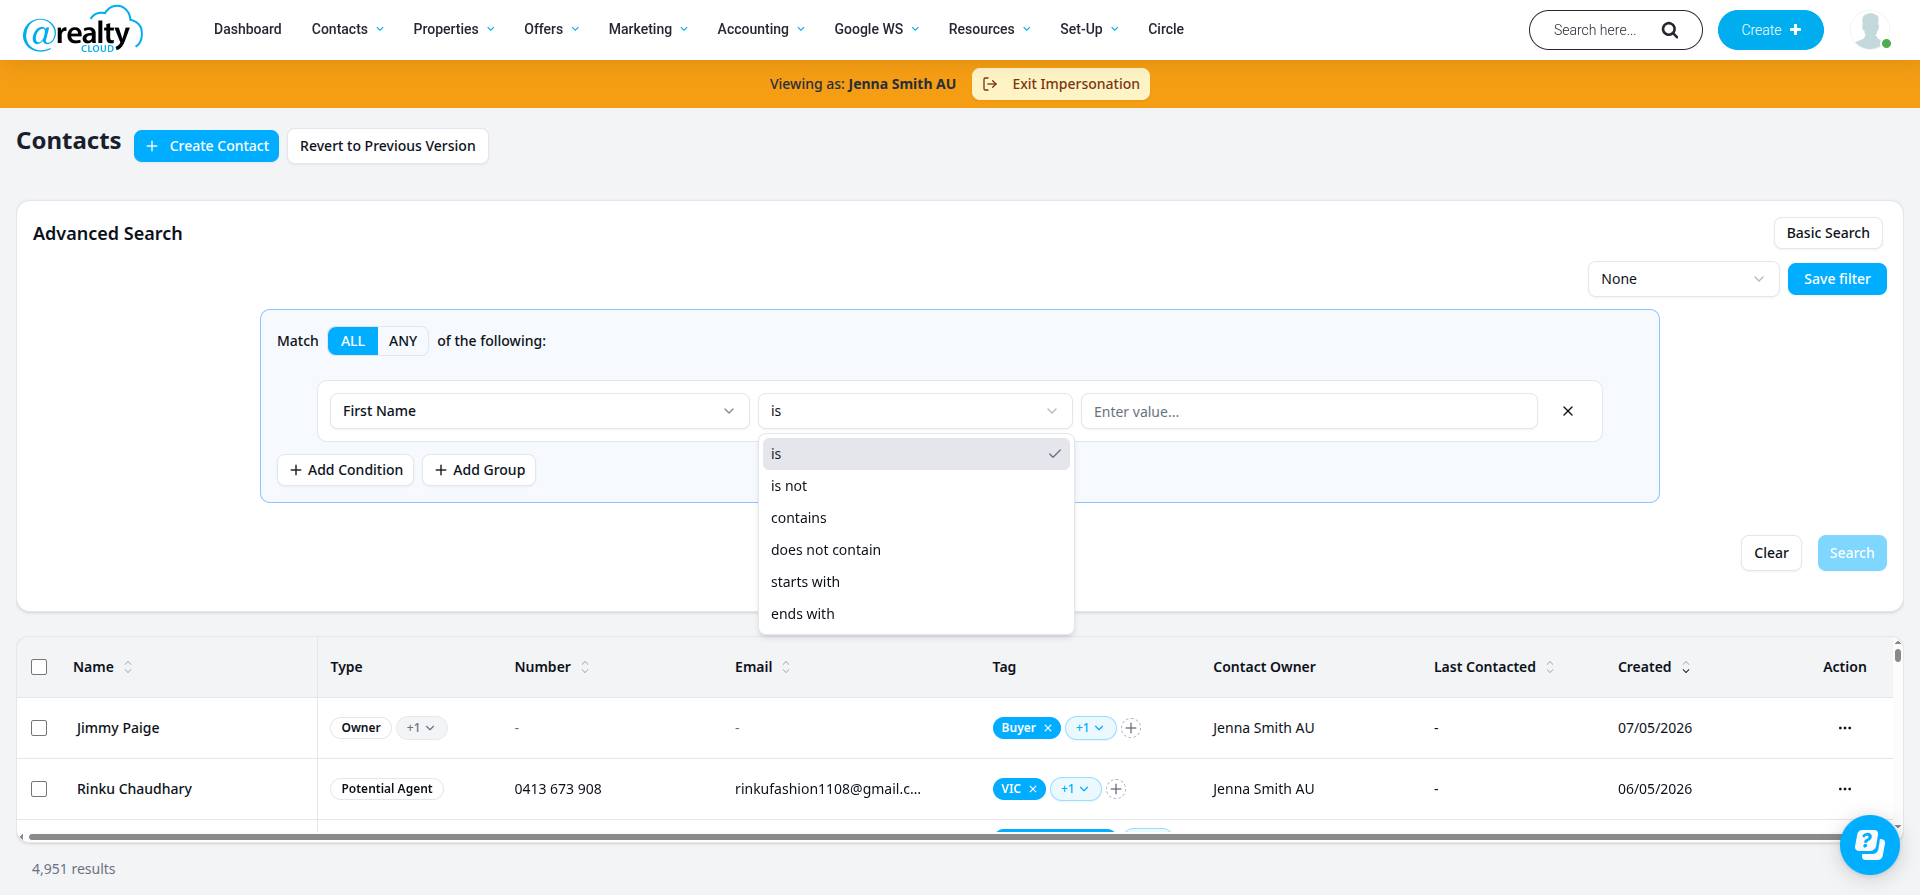
Date fields expose date-comparison operators (greater than, less than, between, is unknown, etc.). The Activity fields (Enquired, Inspections, Purchased) expose a richer set of date and listing-specific operators including count comparisons.
Applied filter chips
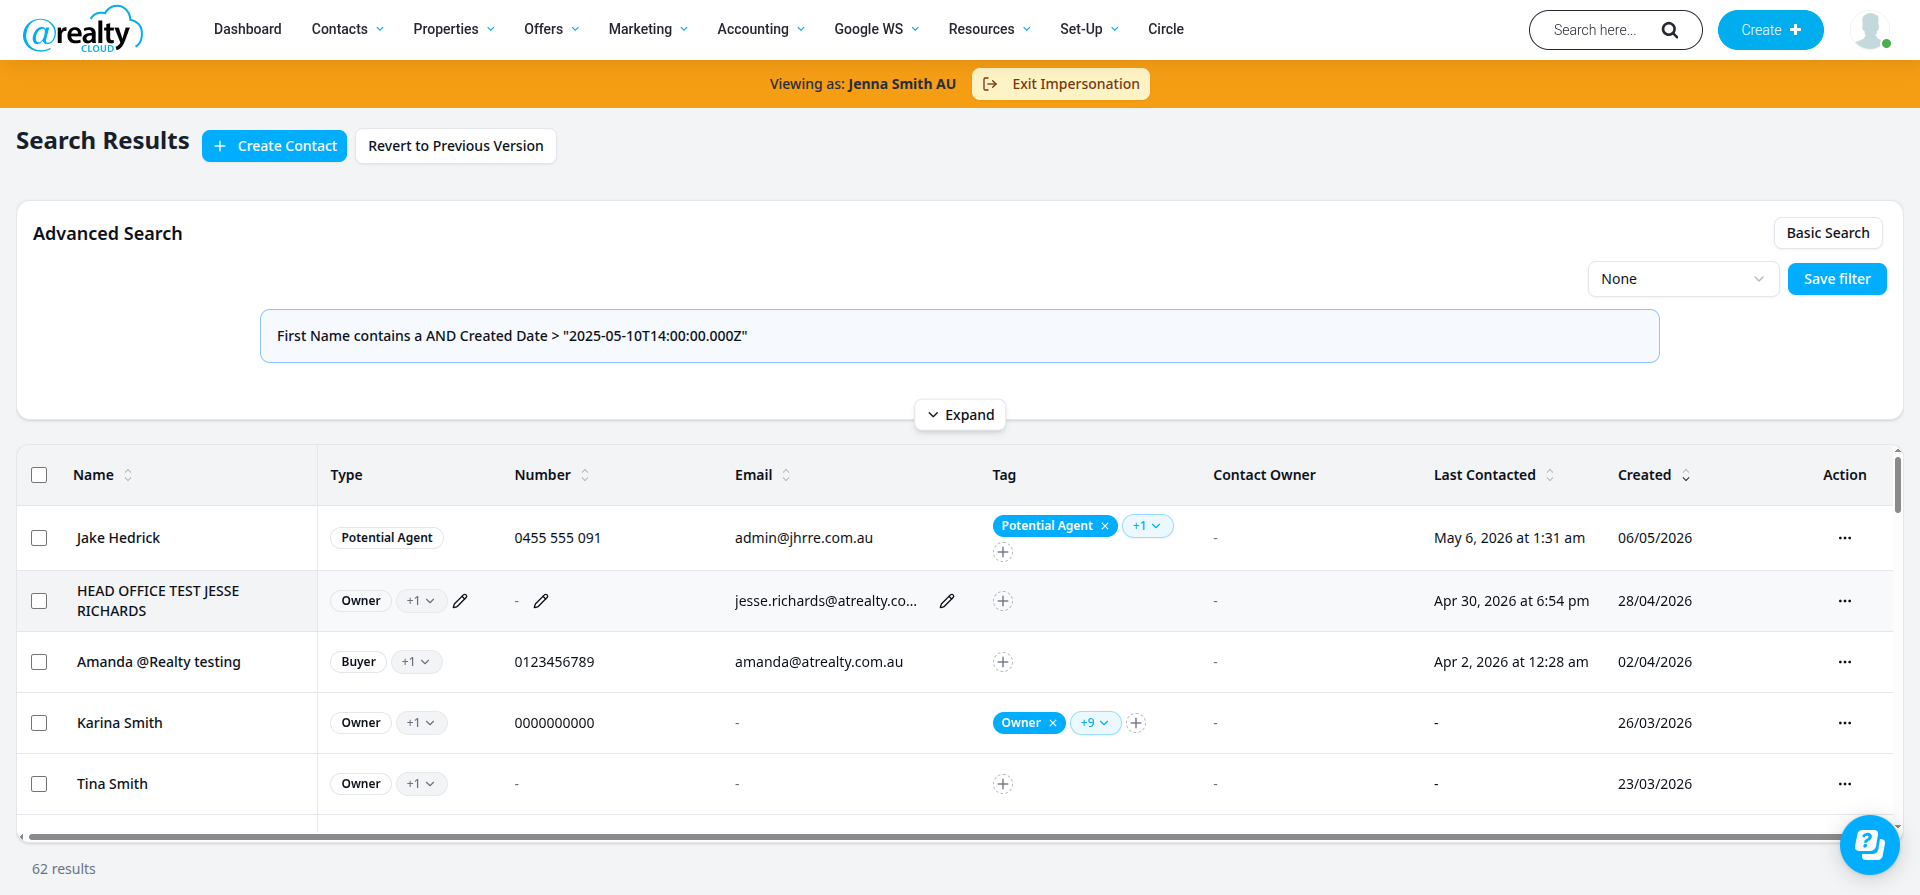
When the User clicks Search in the Advanced Search builder, the applied filter is shown as a chip above the Contacts table.
Old CRM Filter UI (Previous Version)
The filter UI below is available on the previous version of the Contacts page (accessed via Revert to Previous Version on the new Contacts page). It is documented here for reference until equivalent flows are fully covered on the new CRM.
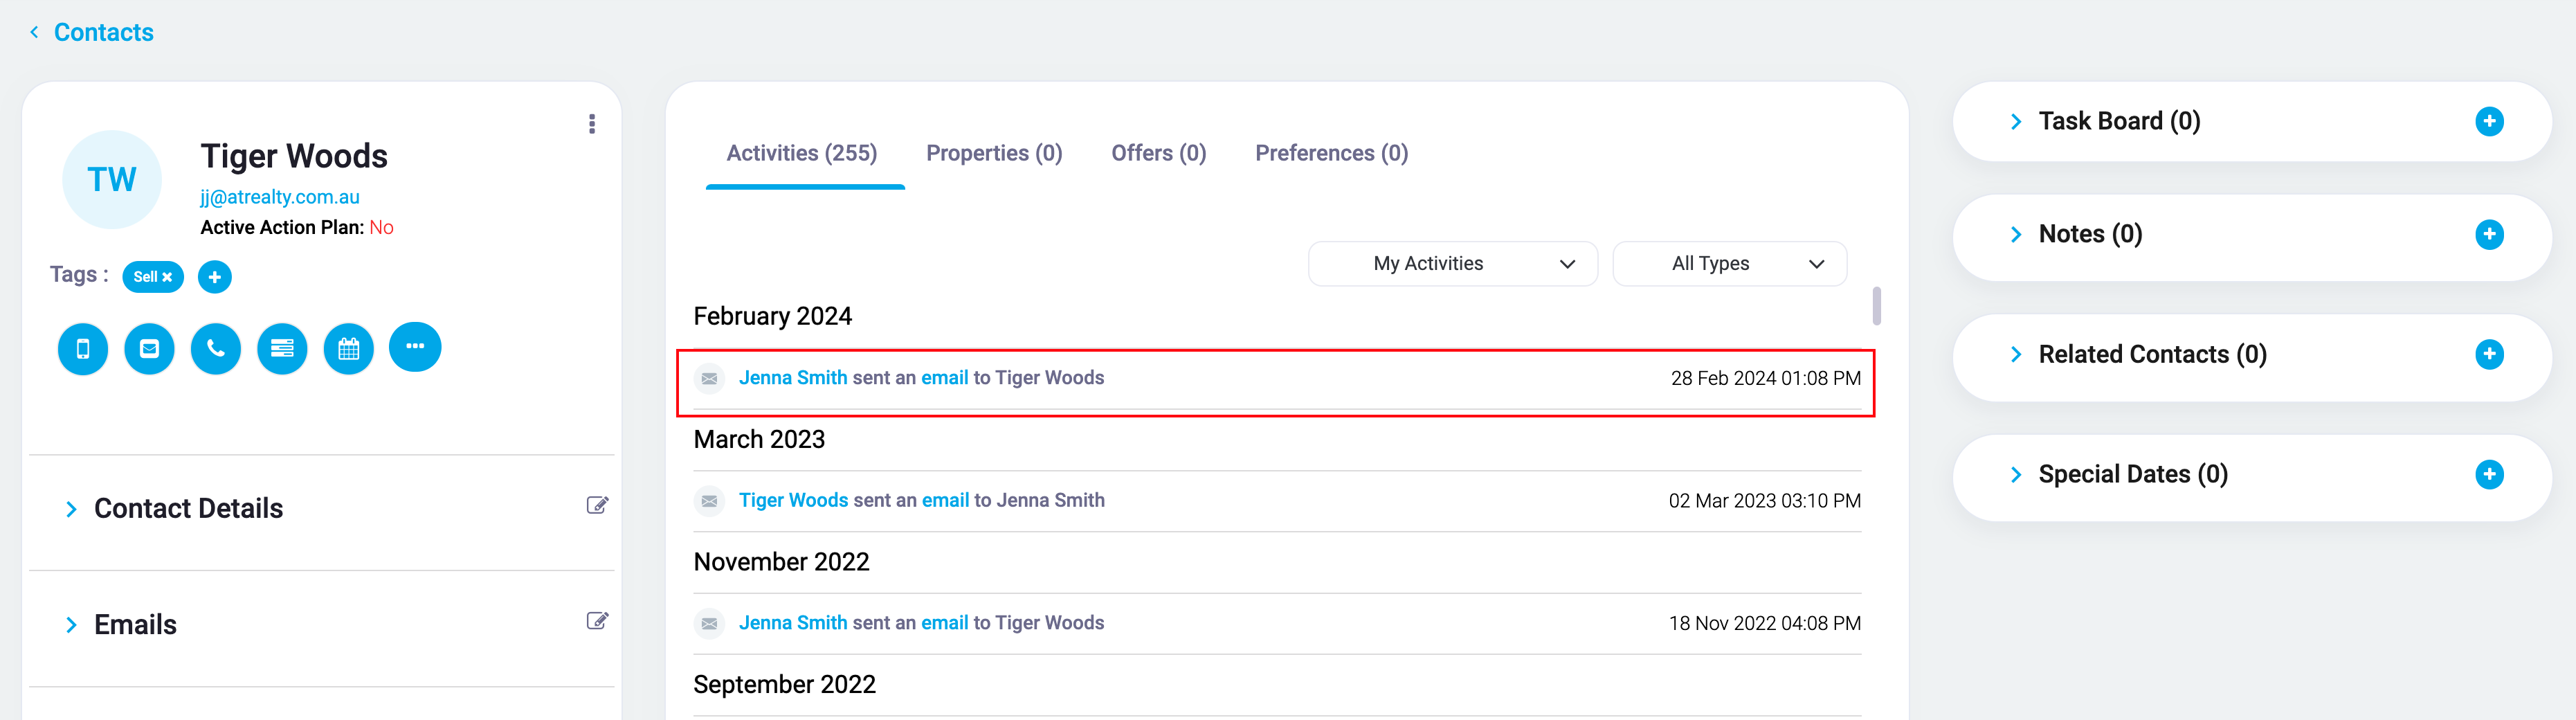
When viewing the previous Contact List View at https://myatrealty.com/v2/contacts there is a Filter button that will display all of the available filters.
Filter Categories
The filter options are categorised based on where the dataset is from. The filter categories are:
- Details - filters based on the Contact Record’s details
- Activity - filters based on the Listing Record’s Activity (enquiries, inspections, etc.)
- Property - filters based on the Property Record’s information
- Preferences - filters based on the Contact Records Preferences
Details Filters
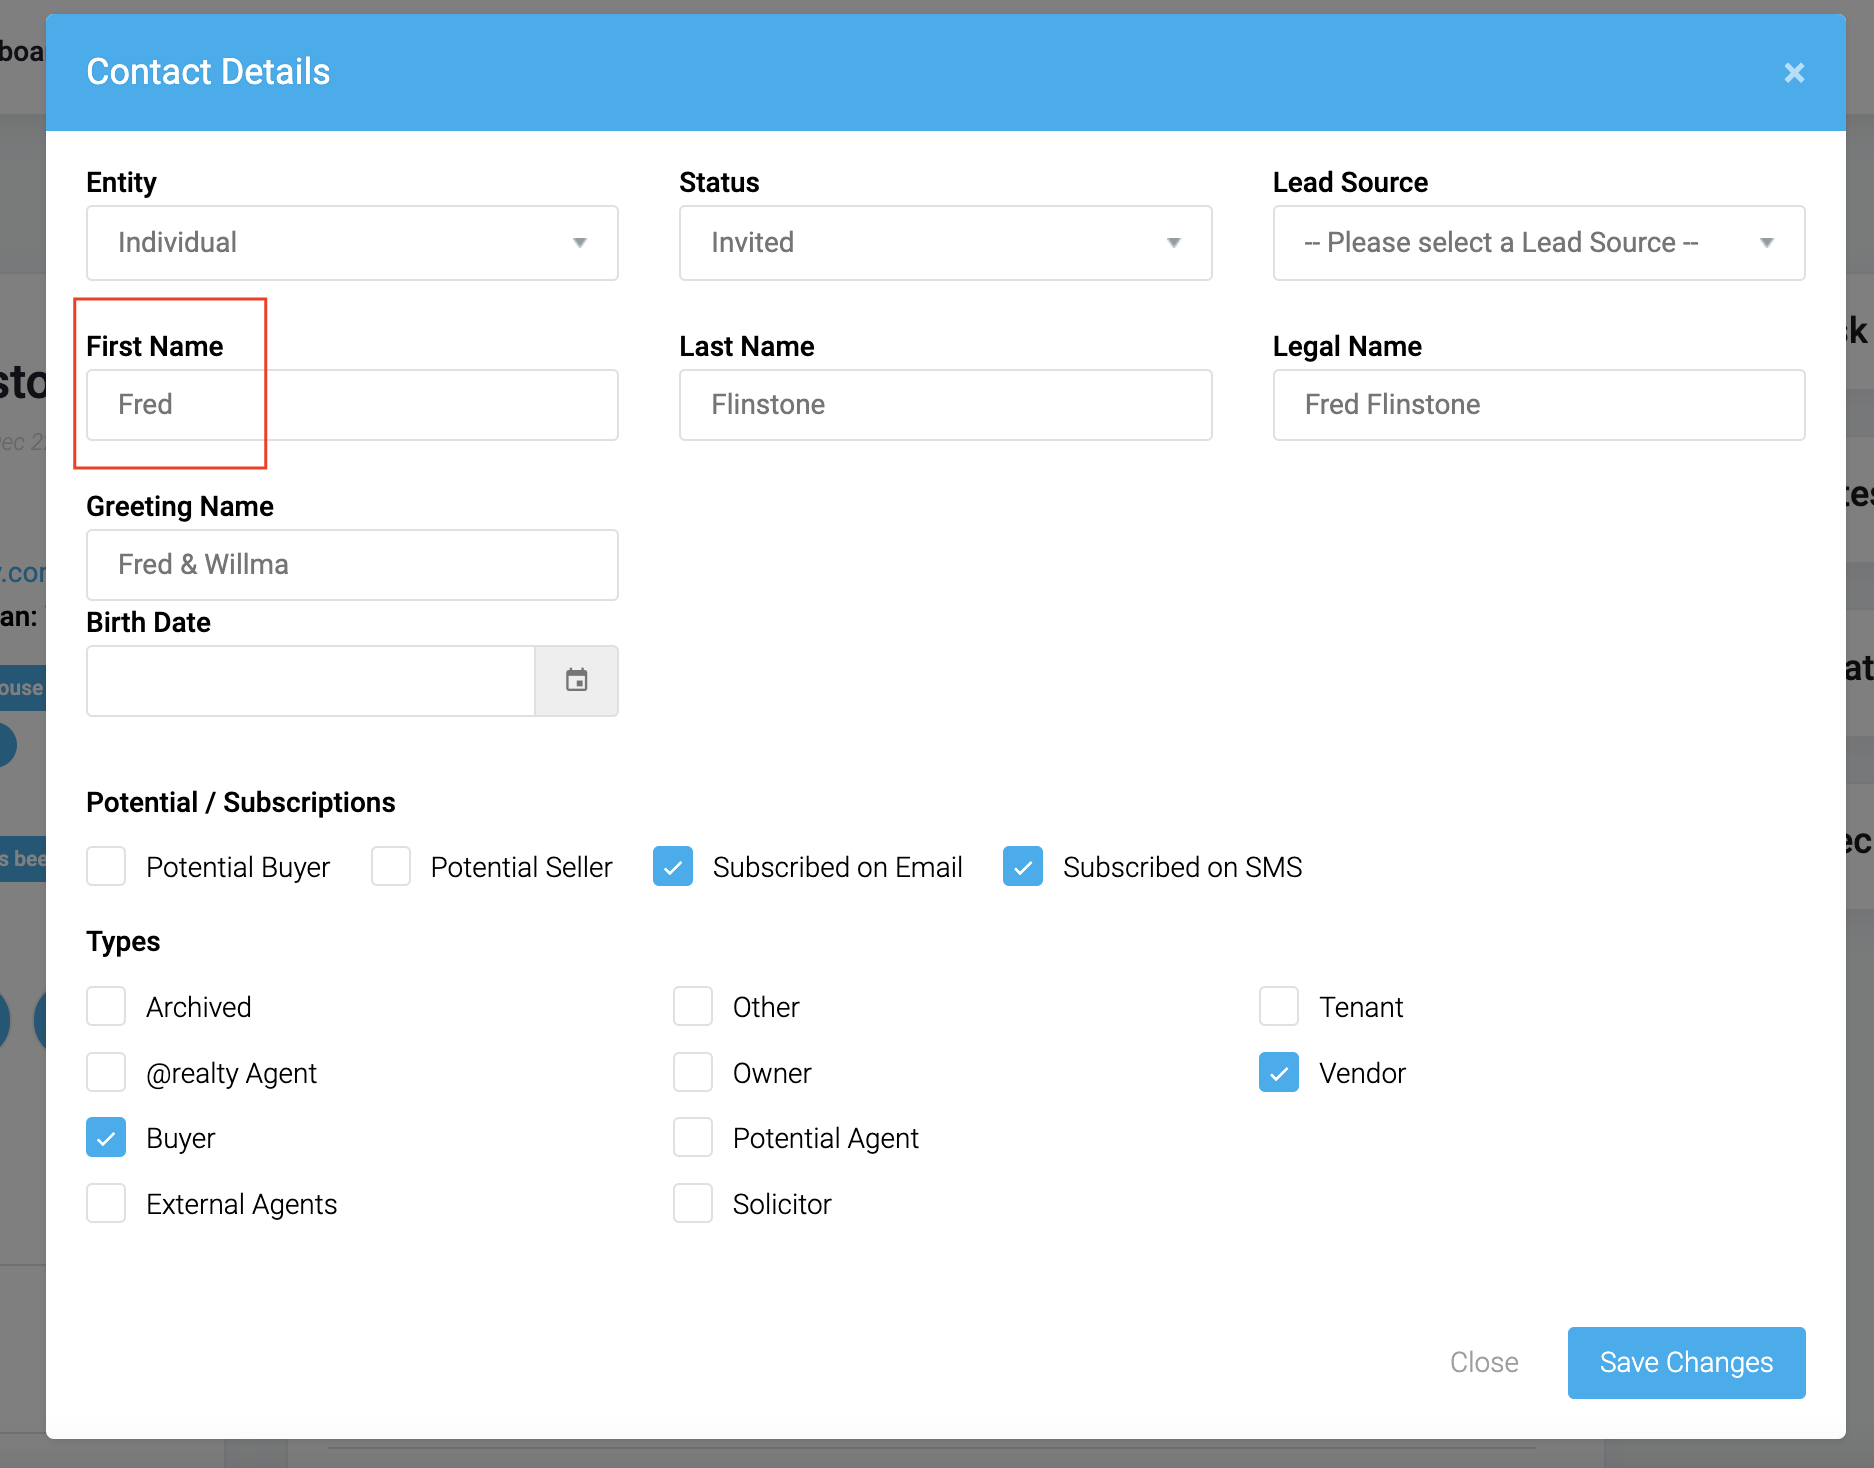
First Name
This will search Contacts based on the First Name field.
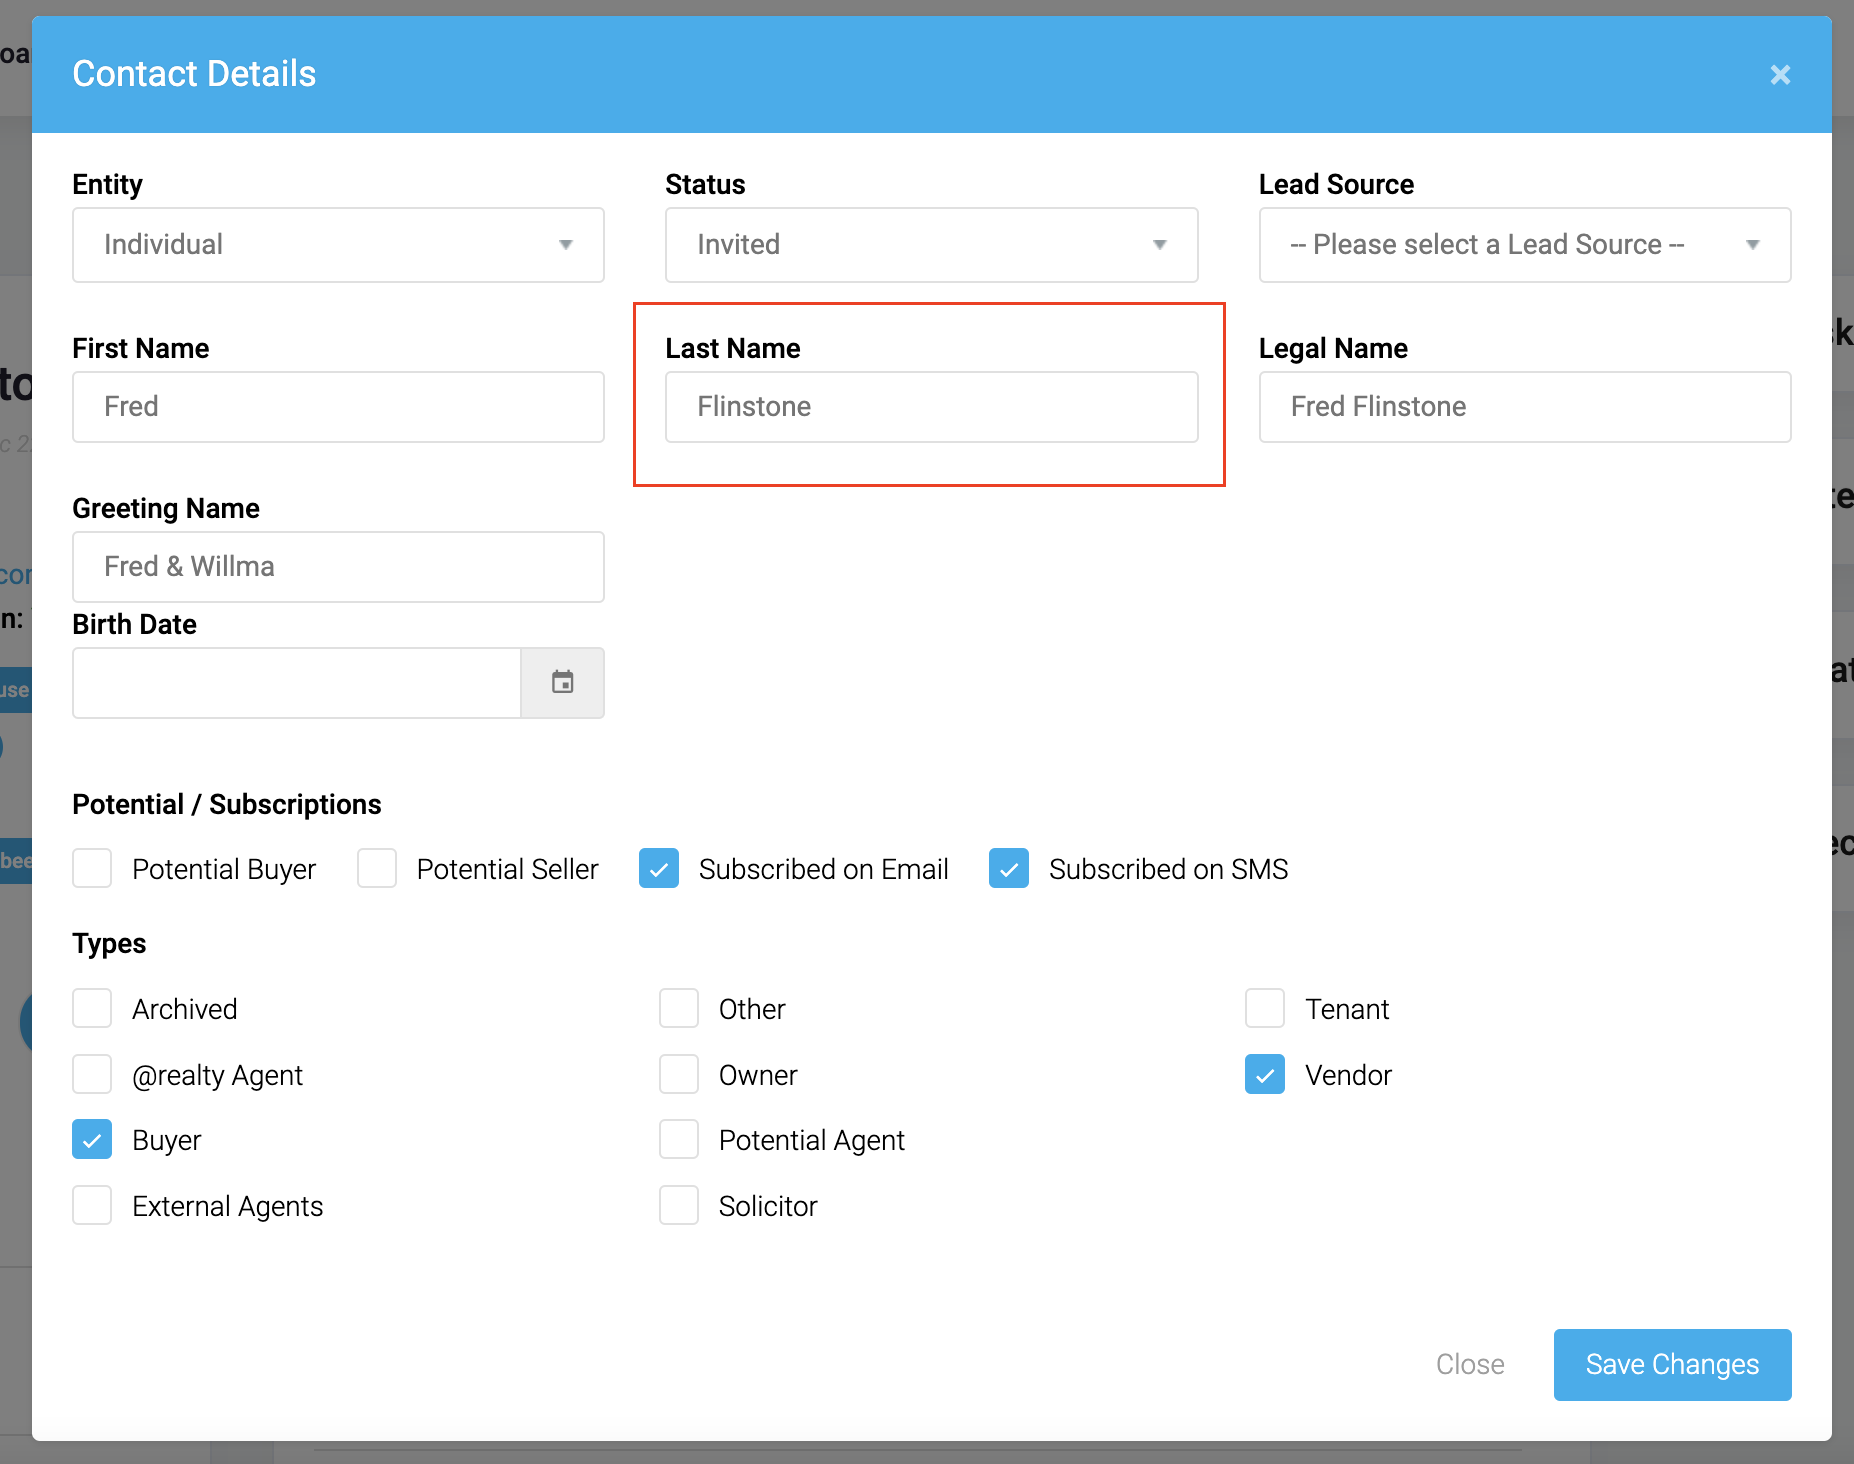
Last Name
This will search Contacts based on the Last Name field.
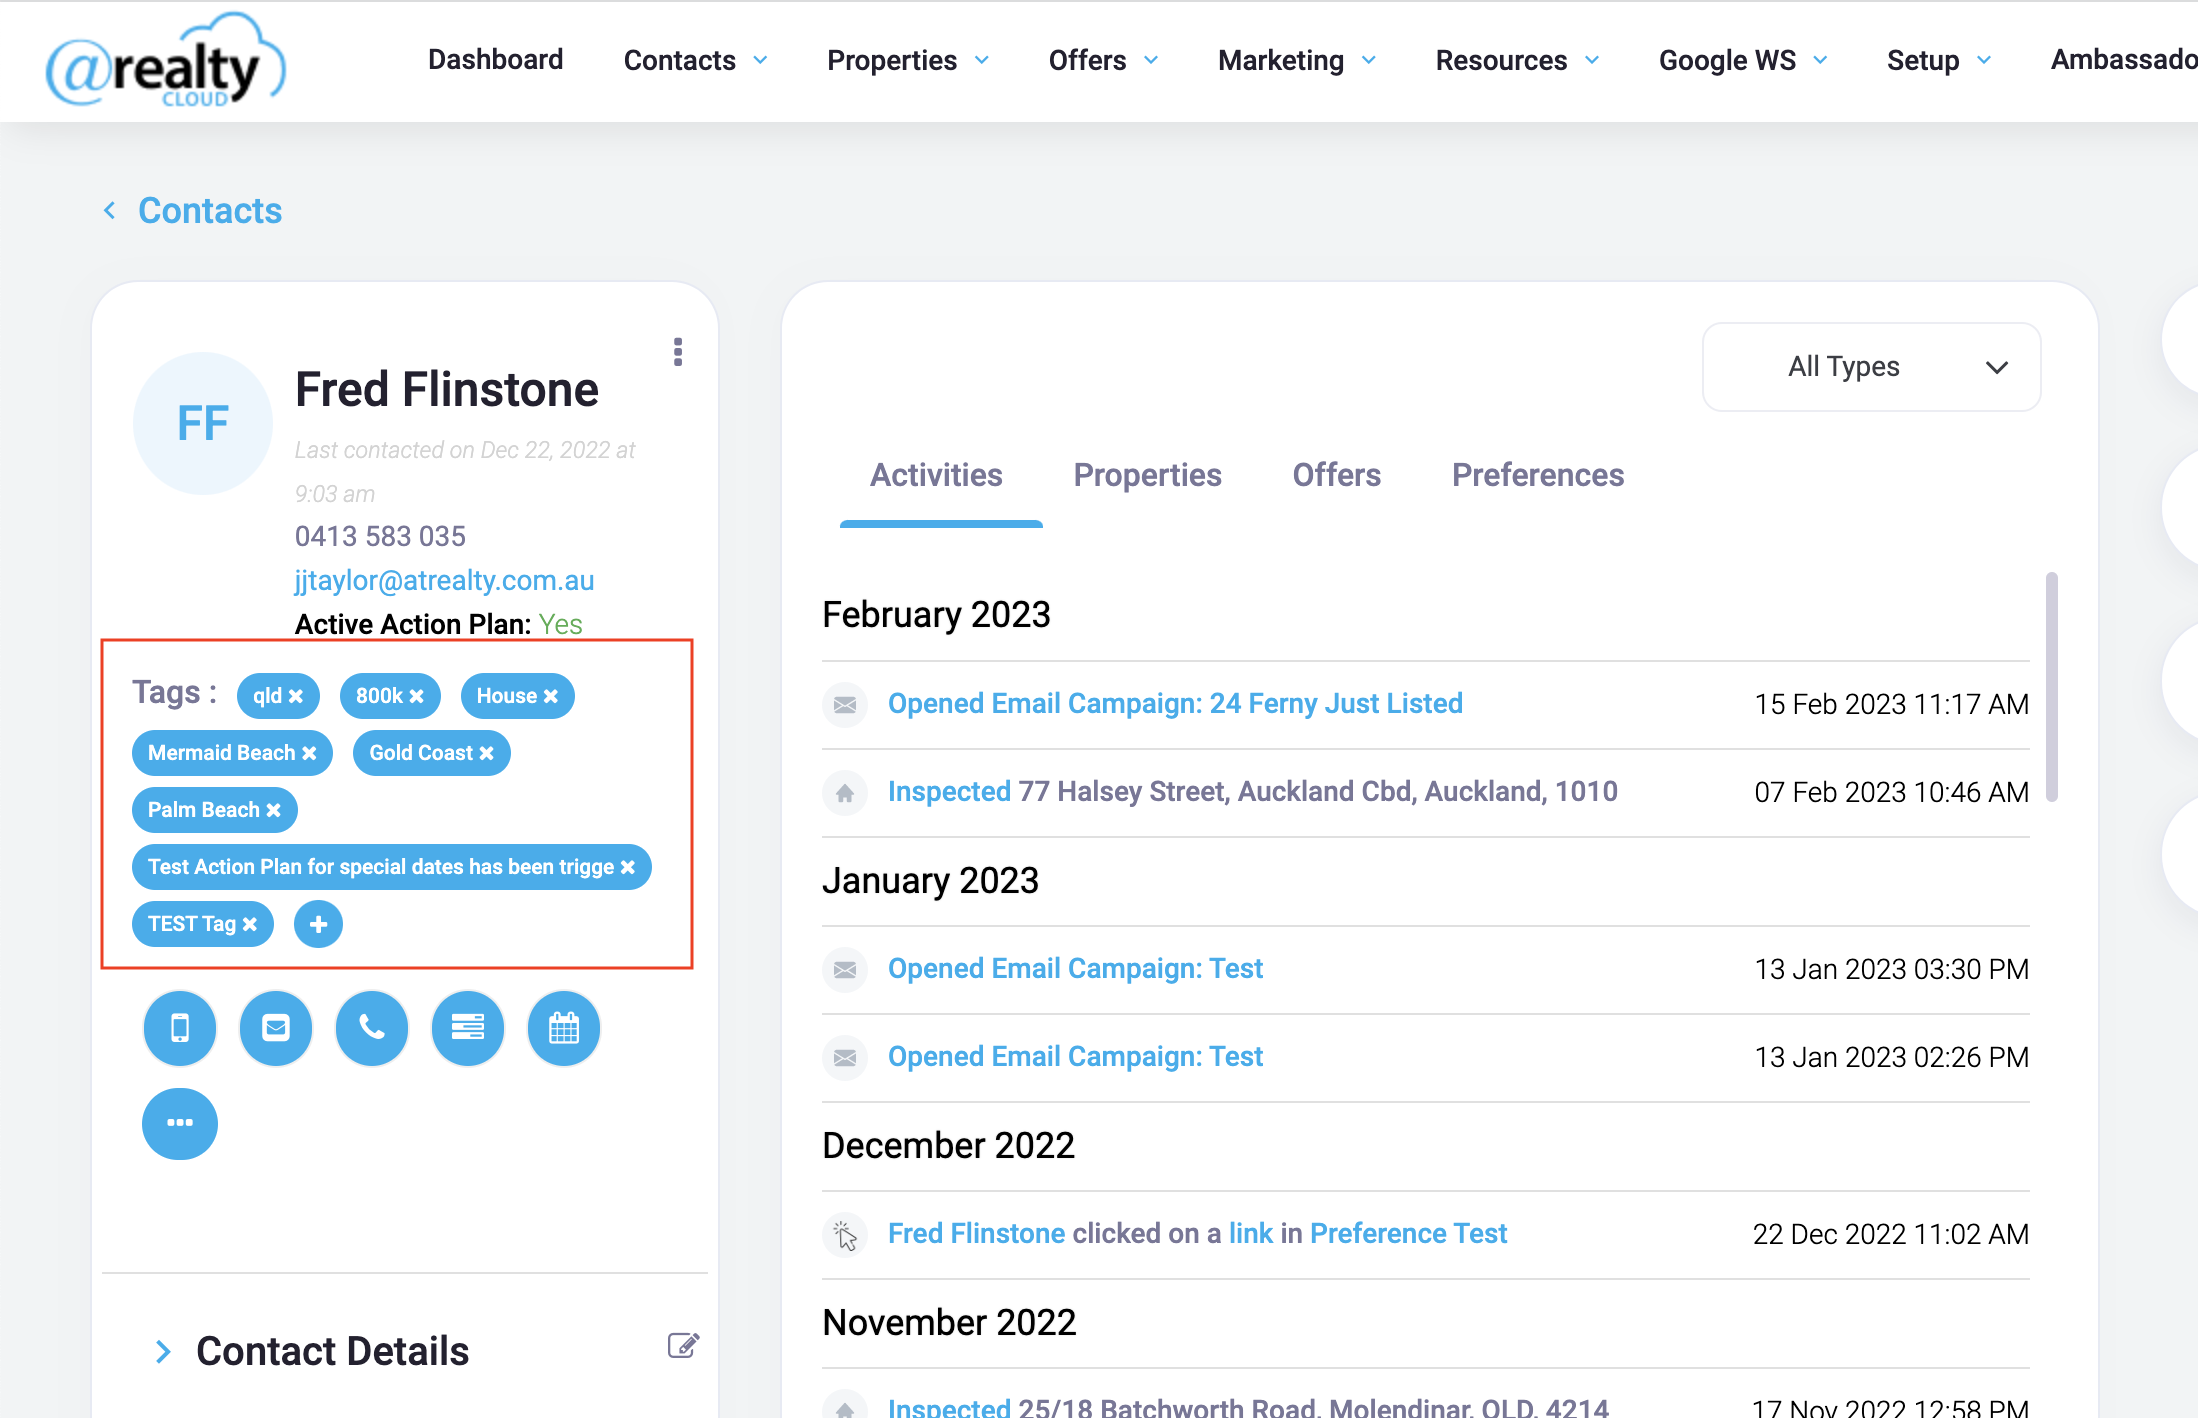
Tags
This will filter the Contacts based on the Tags associated to the Contact Record.
Groups
This will display Contacts that are part of the selected Group you are filtering by
Types
This will filter the Contacts based on the type that is assigned to them.
Last Contacted Date
This will filter Contacts based on the Last Contacted Date.

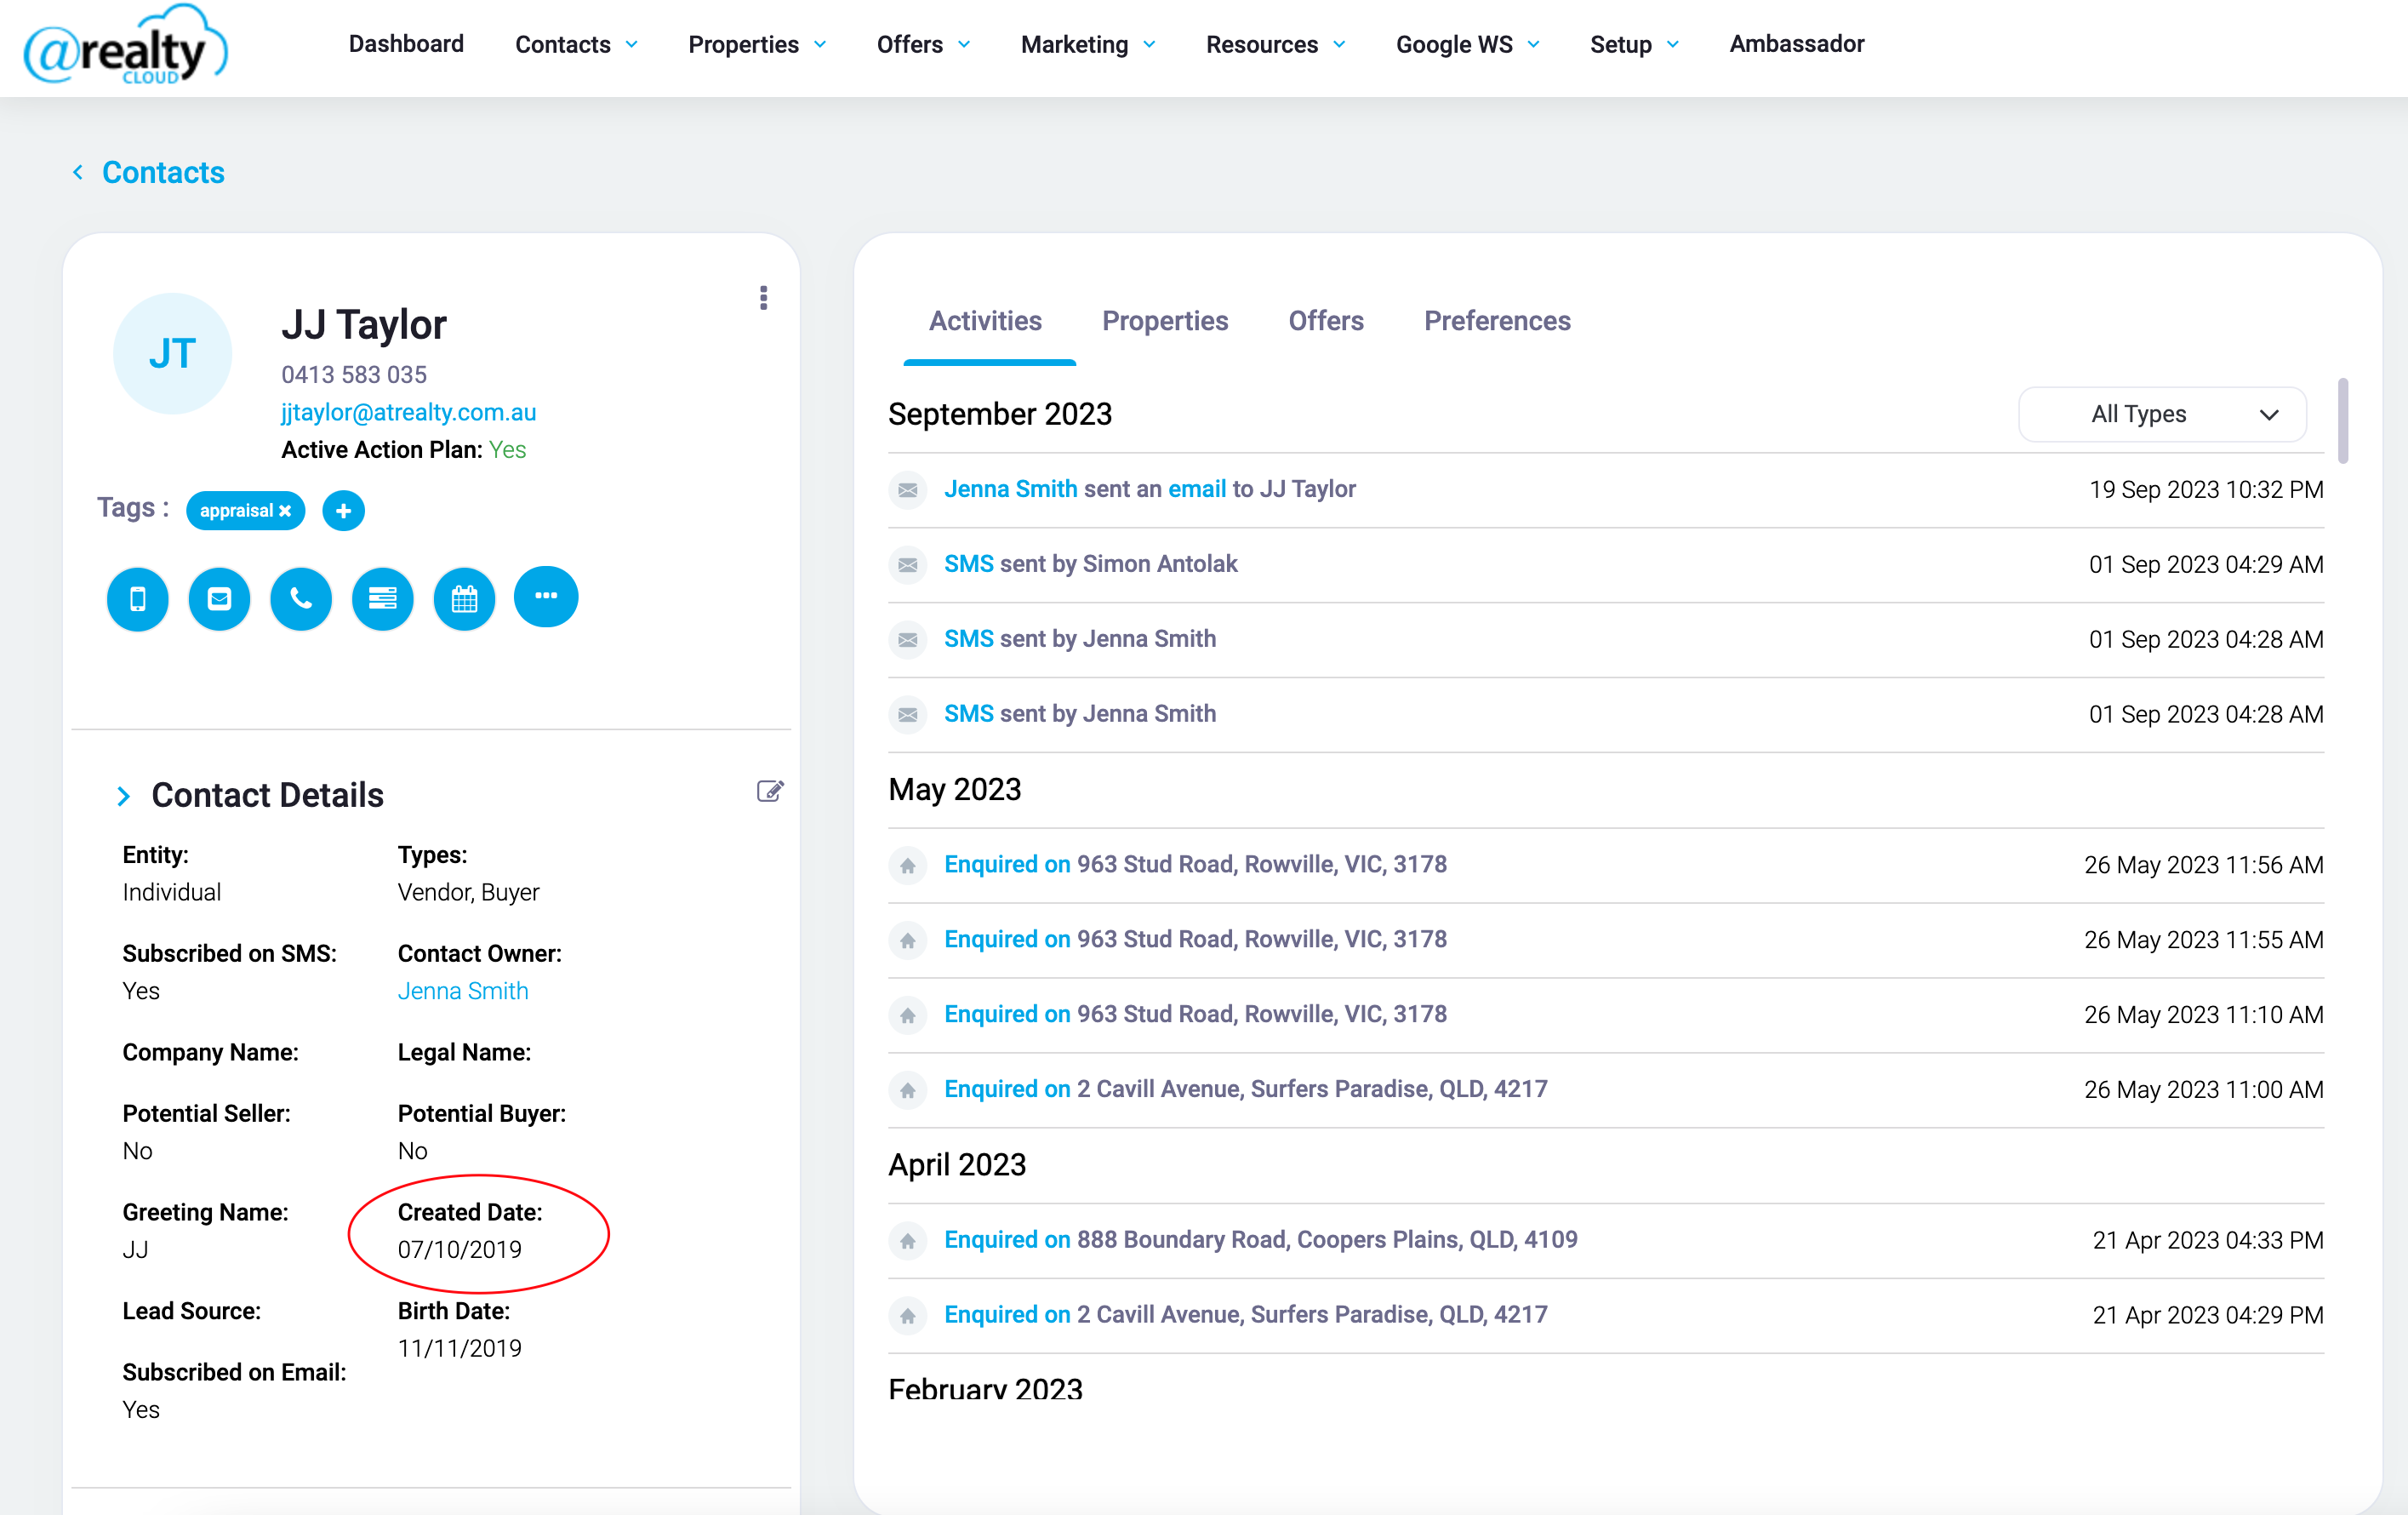
Created Date
This will filter Contacts based on the Created Date.
Updated Date
This will filter Contacts based on the last time the Record was updated. This can include changing any details, adding notes or adding associated records such as Property Records.
Special Dates
This will filter the Contacts based on their associated Special Dates.
Address
This will filter the Contacts based on the Addresses associated to the Contact Records.

Suburb
This will filter the Contacts based on the Suburb of the Addresses associated to the Contact Records.
Email Subscribed
This will filter Contacts based on the Email Subscription status.
SMS Subscribed
This will filter Contacts based on the SMS Subscription status.
Display Archived
This will display the Archived Contact Records.
Team
This will filter the Contacts based on the Contact Owner.

Activity Filters
Enquired
This will filter based on the Enquiry Records associated to the Contact Records
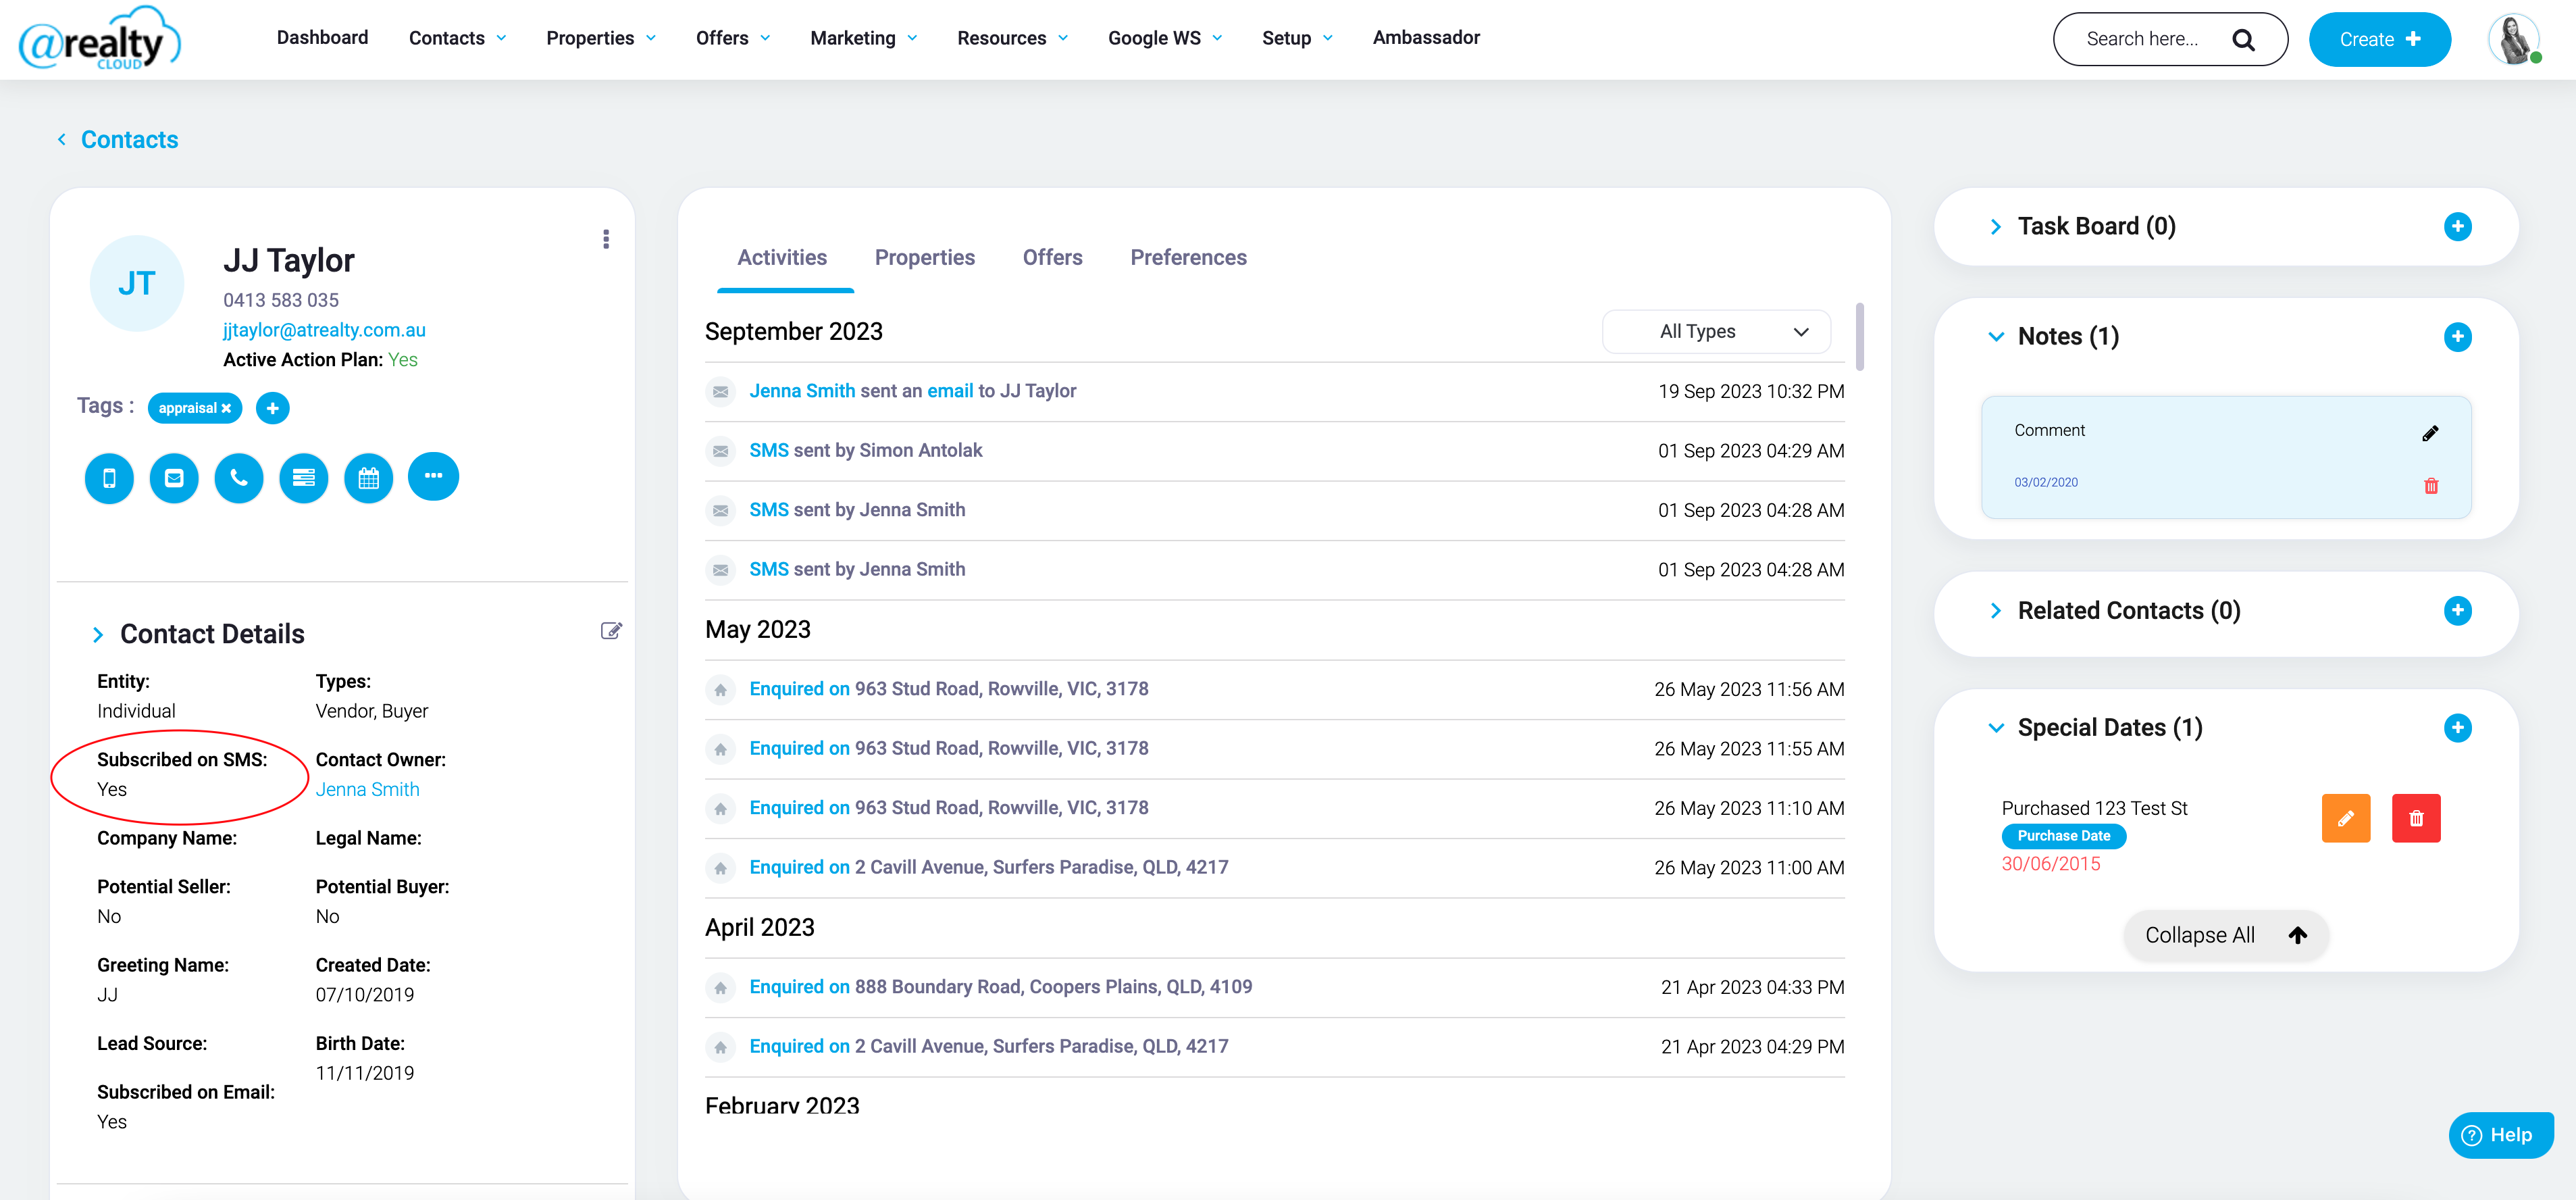
Inspections
This will filter Contacts based on associated Enquiry Records with Source = Inspection

Purchased
This will filter the Contacts that are attached to Offer Records that are marked as ‘Settled’ for Listing Records that are Residential For Sale, Commercial For Sale, Commercial Both or Business For Sale
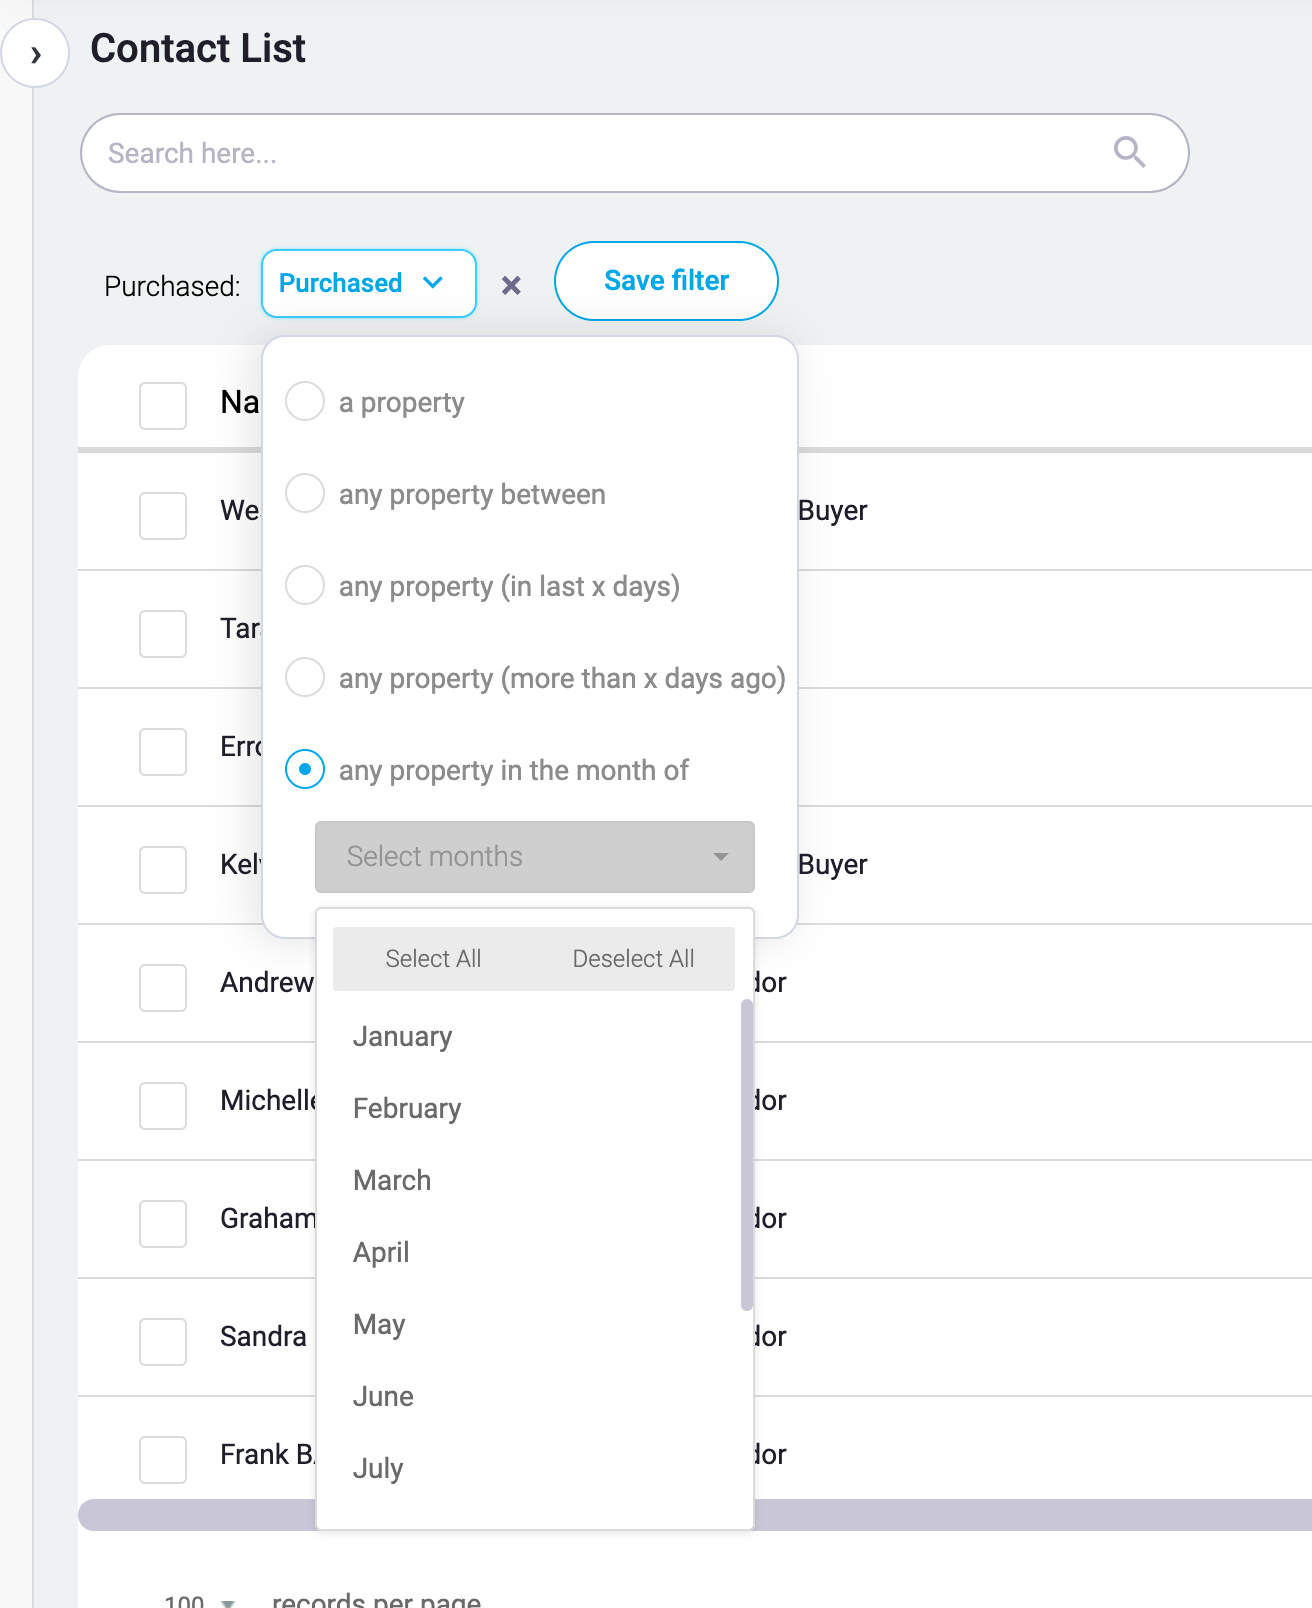
Purchased in the Month Of
Users can filter their Contacts based on the month of ANY year that contact has purchased a Property. This is helpful if the User wants to view the Contacts that have purchased in the current month so they can reach out for the purchase anniversary.
Preference Filters
These filters will search the Contact Records based on the Preference Records that are associated with them.
Price
When entering a searchable price range, the contacts that display will have a Preference Record that contains a price range that overlaps with the entered range.
For example if the filter range is $900,000 to $950,000 then any Contact records with the following ranges in their Preference Records will display:
Example #1: Blank to $900,000

Example #2: $950,000 to Blank

Example #3: $850,000 to $910,000

Example #4: $930,000 to $1,000,000

Property Filters
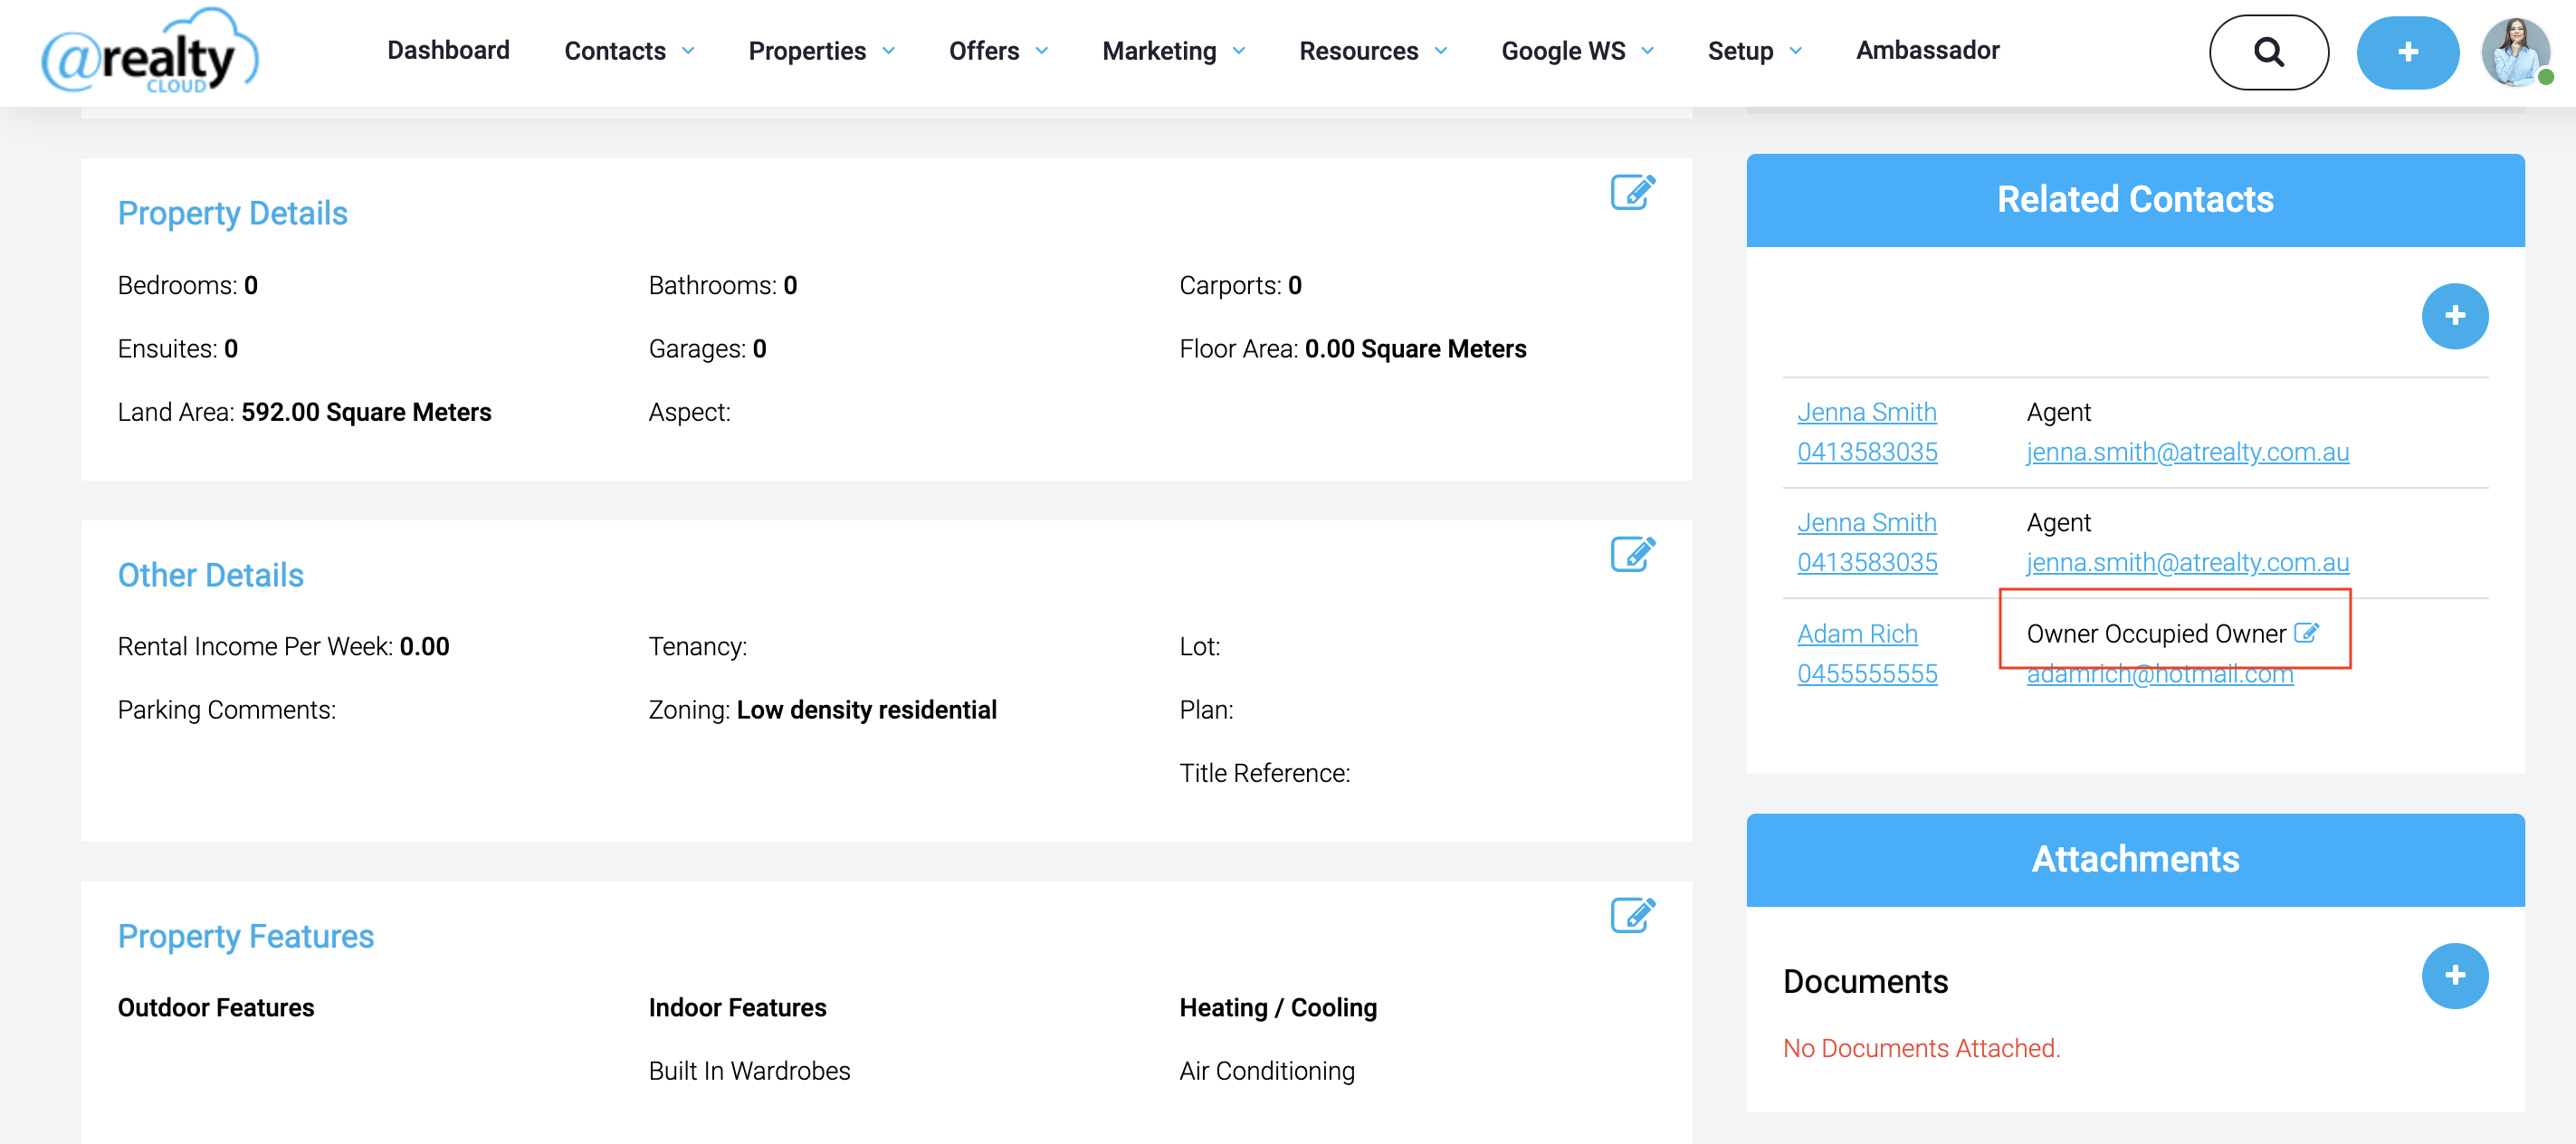
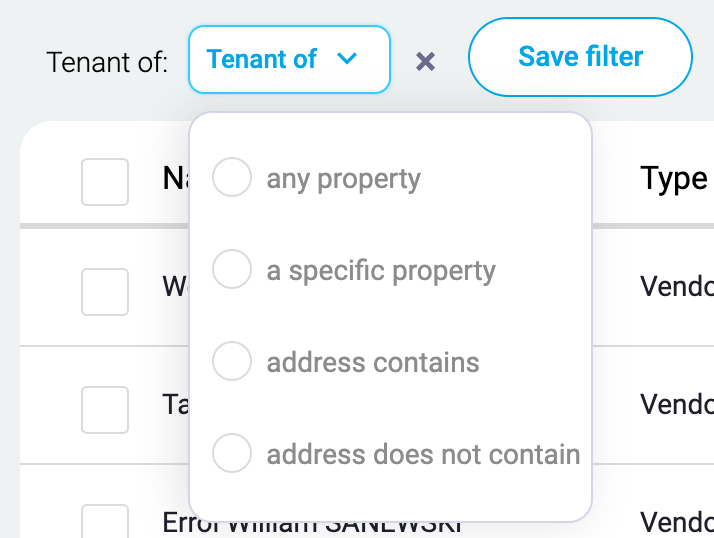
Owner of
This will filter the Contacts based on their Ownership relationship to Property Records. If the Contacts is NOT an Owner of a Property Record in the CRM, they will not display.
If Investment Properties is selected, then Contacts that are marked as Investment Owners in the Property Records will display

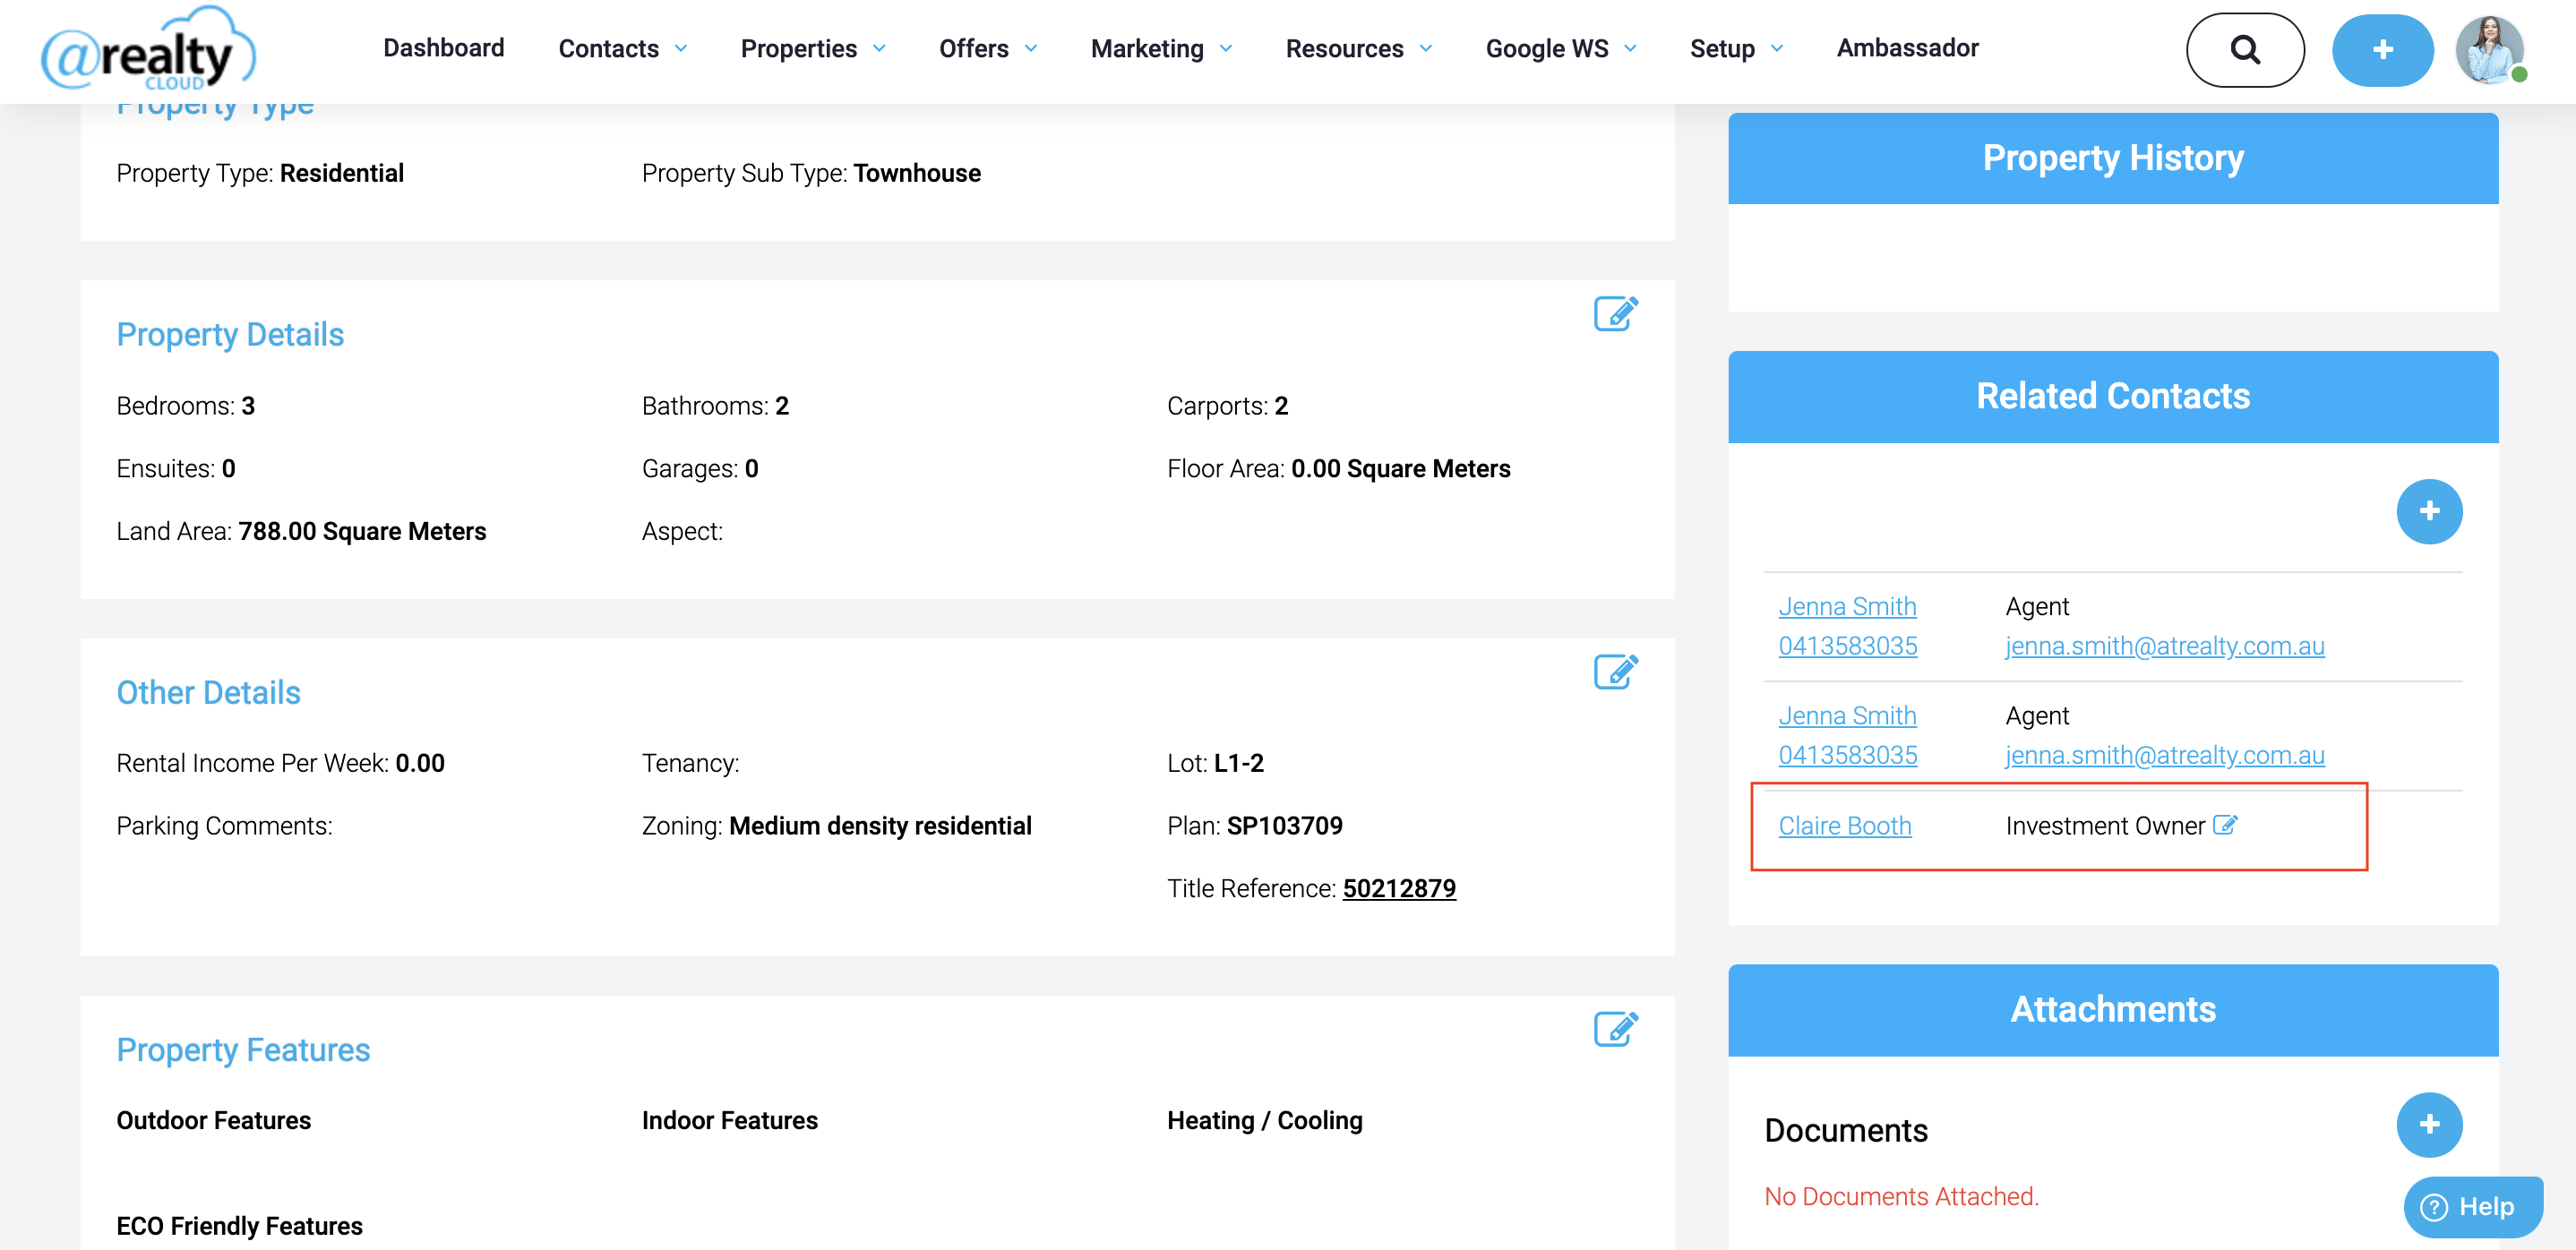
If Owner-Occupied Properties is selected, then Contacts that are marked as Owner Occupied Owners in the Property Records will display

Was this article helpful?
That’s Great!
Thank you for your feedback
Sorry! We couldn't be helpful
Thank you for your feedback
Feedback sent
We appreciate your effort and will try to fix the article